

Block printing has been around for more than a thousand years. It is one of the most popular printmaking techniques . Traditionally an image is carved with some sharp tools on a block of wood, producing a “stamp”, which then could be painted with ink and pressed onto paper or fabric to produce a “print”. Over time many other surfaces like metal and linoleum started to get used along with wood for this kind of printmaking process. Very recently another material (some form of rubber sheets or rubber blocks) is being used which made the carving process involved in this kind of printmaking very easy. And that is how I am able to introduce this to an 8 (then) year old studio partner! She started making carved stamps out of eraser when she was 6 and got so interested in the process that I had to introduce her to printmaking. And she loved it! Specially the carving part!
Few things to keep in mind while choosing your material:
Choosing the printing block: As you will be working with kid/kids, choose a printing block which is easy to carve. We used Rubber sheets/ rubber blocks ( Speedball Speedy-Carve printing block) which is very soft and that way very easy to carve.
Go ahead and use linoleum block if you are not working with children.
Choosing carving tool: Choose 3 linoleum cutters: One small blade (for details), one V shaped blade for outlines and one U shaped blade to carve out larger areas.
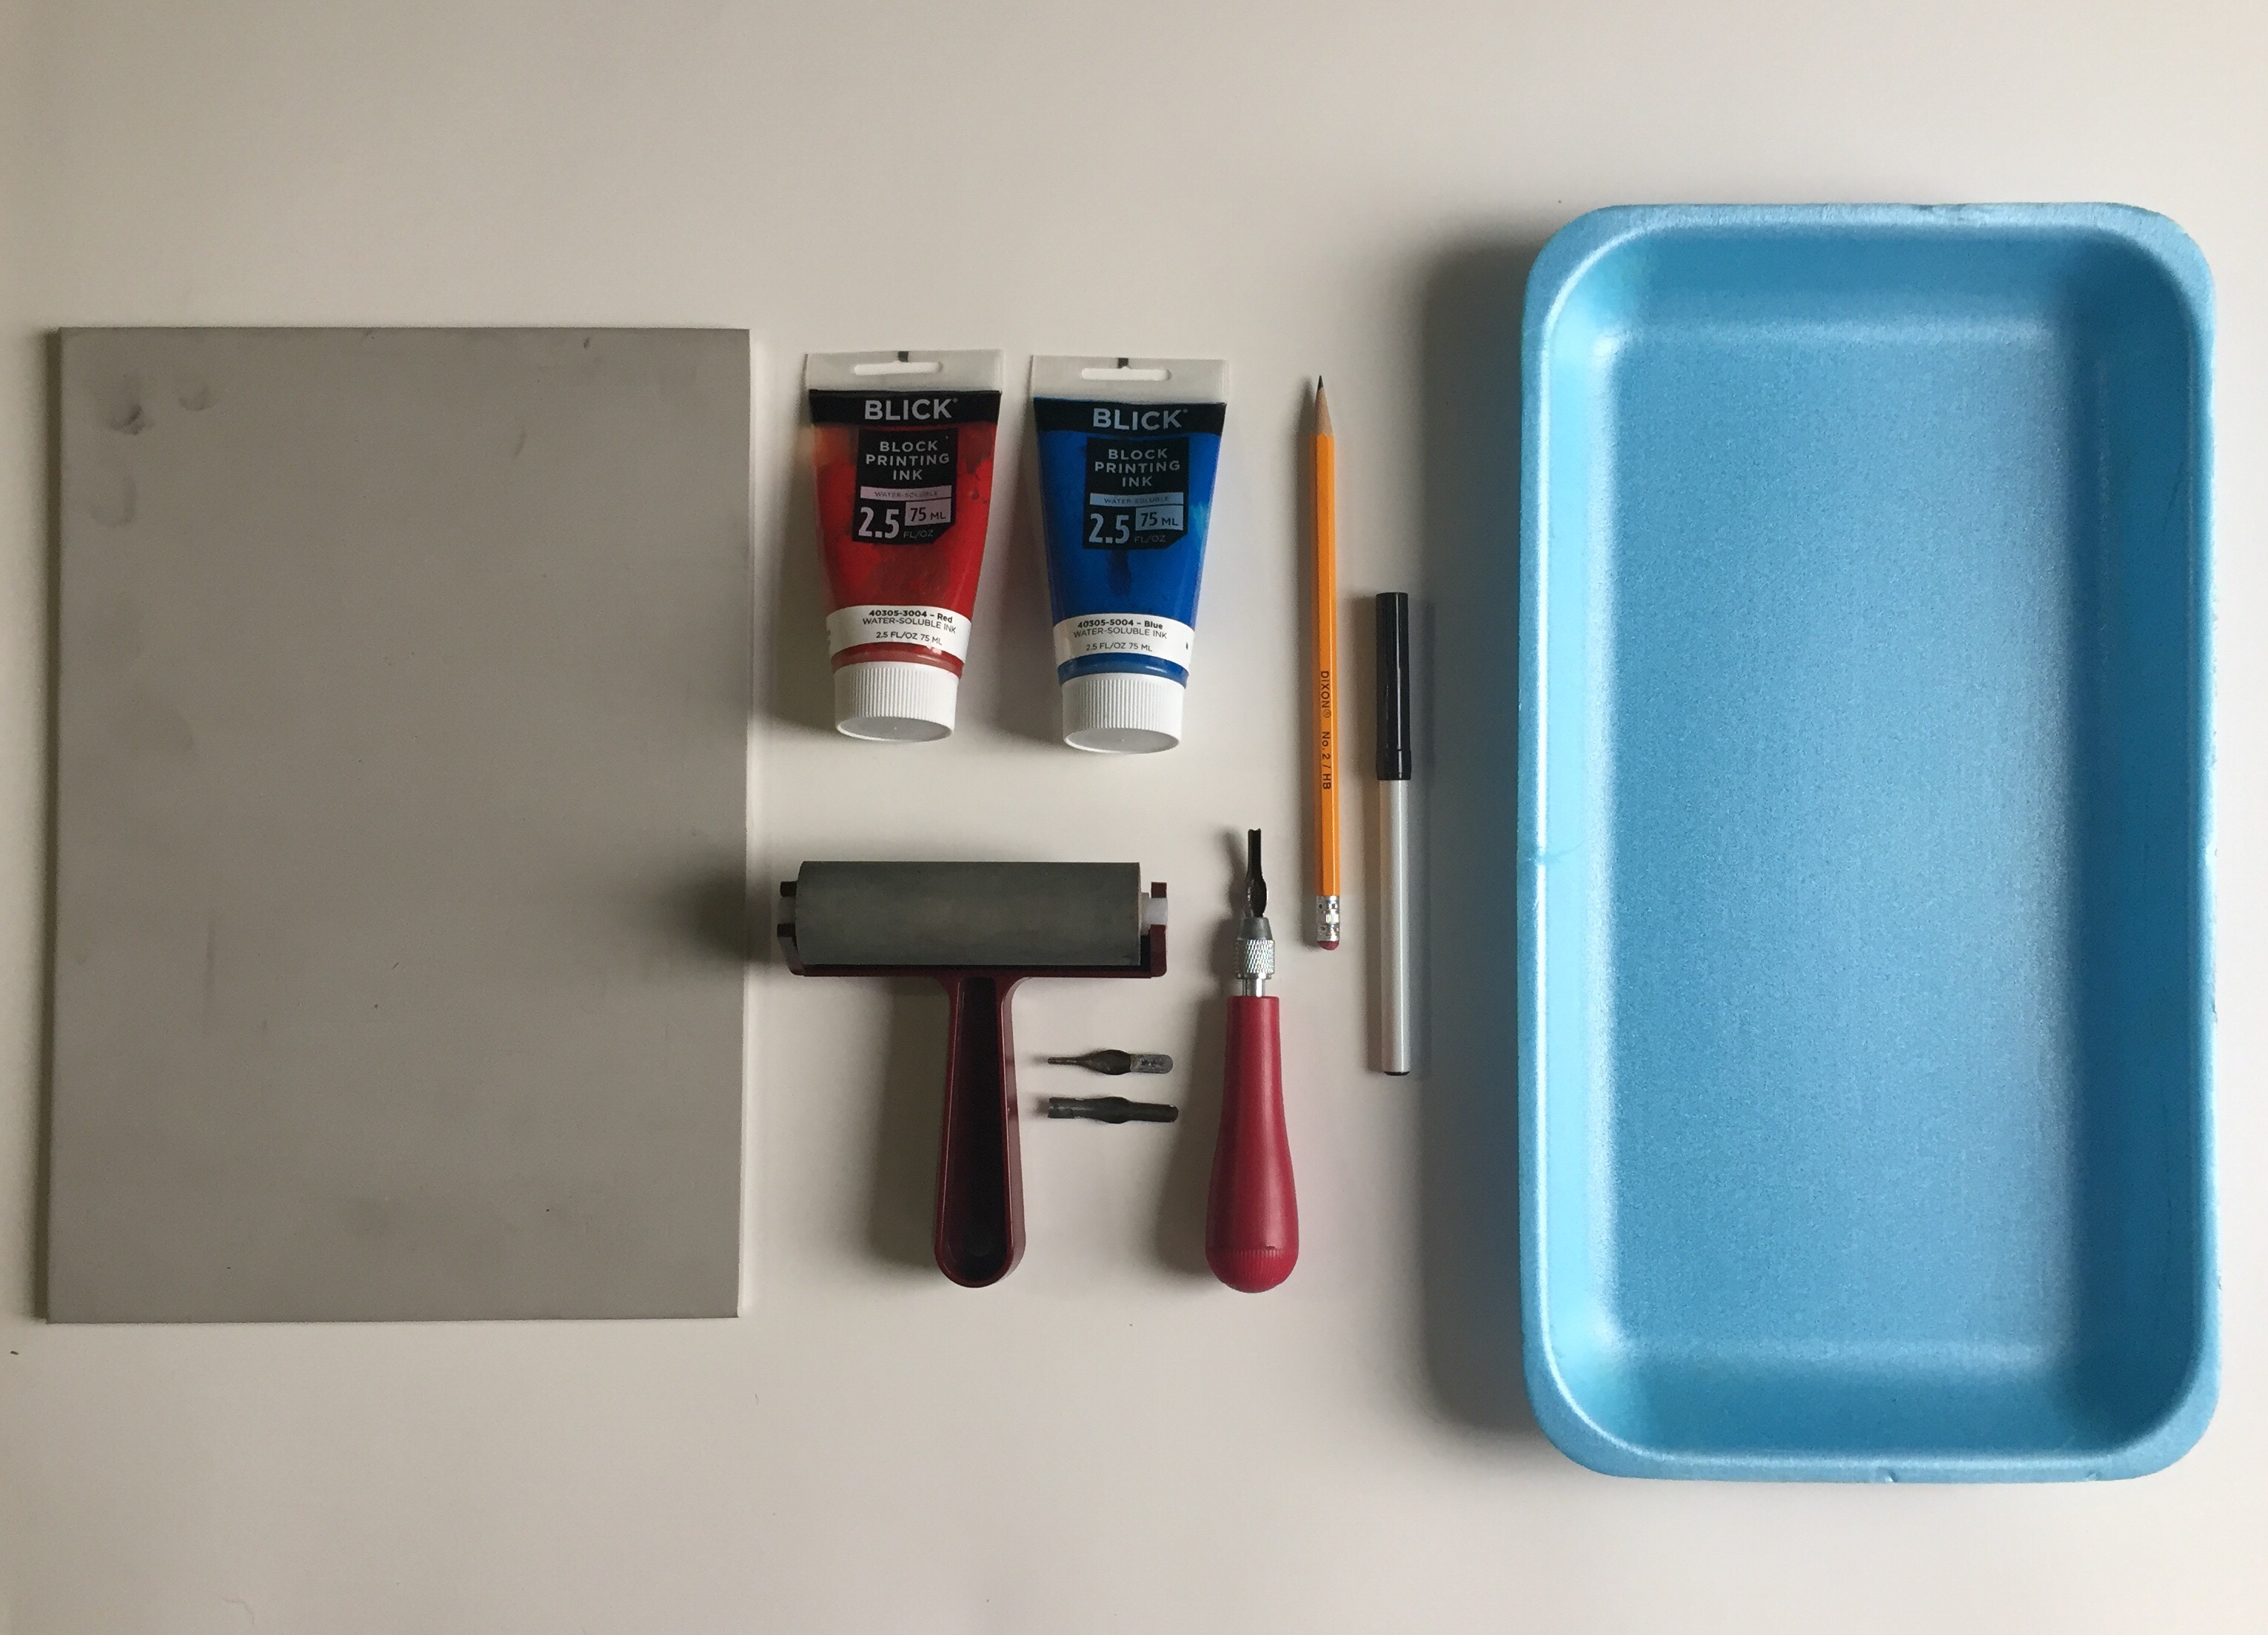
So here is the entire Material list:
- Printing block- A Speedball Speedy-carve block. (We cut it according to our need)
- A 4 inch rubber brayer (Ink roller)
- A barren (not necessary, we just used the back of a spoon. But for intricate projects, investing on a barren would be helpful.
- carving tools/linoleum cutters
- A non absorbent board/glass plate/foam plate for rolling out ink (we used a foam plate/tray saved from grocery store)
- Water soluble Block printing ink (we used Blick Block Printing Ink)
- Paper to print- Not in picture (we used 8″X10″ Strathmore Printmaking paper)
PROCESS: Simply the steps in block printing are DRAW,CARVE, INK, PRINT AND REPEAT!!!
Draw: What should be the design? Hmm…start with something very simple which will be easy for the kids to carve and understand the process. It could be the first letter of his/her name or a logo or any other pattern/design. You can also trace any small design/pattern from printed fabric or any book you find around you. Or you/your child can come up with your own drawing like she did here. I explained the entire process of making a print and then asked her to come up with a simple drawing which will involve 2 colors (we will use two inks/colors and the white from the paper will also show through)
She came up with this idea which I think is perfect to start with and understand the process.
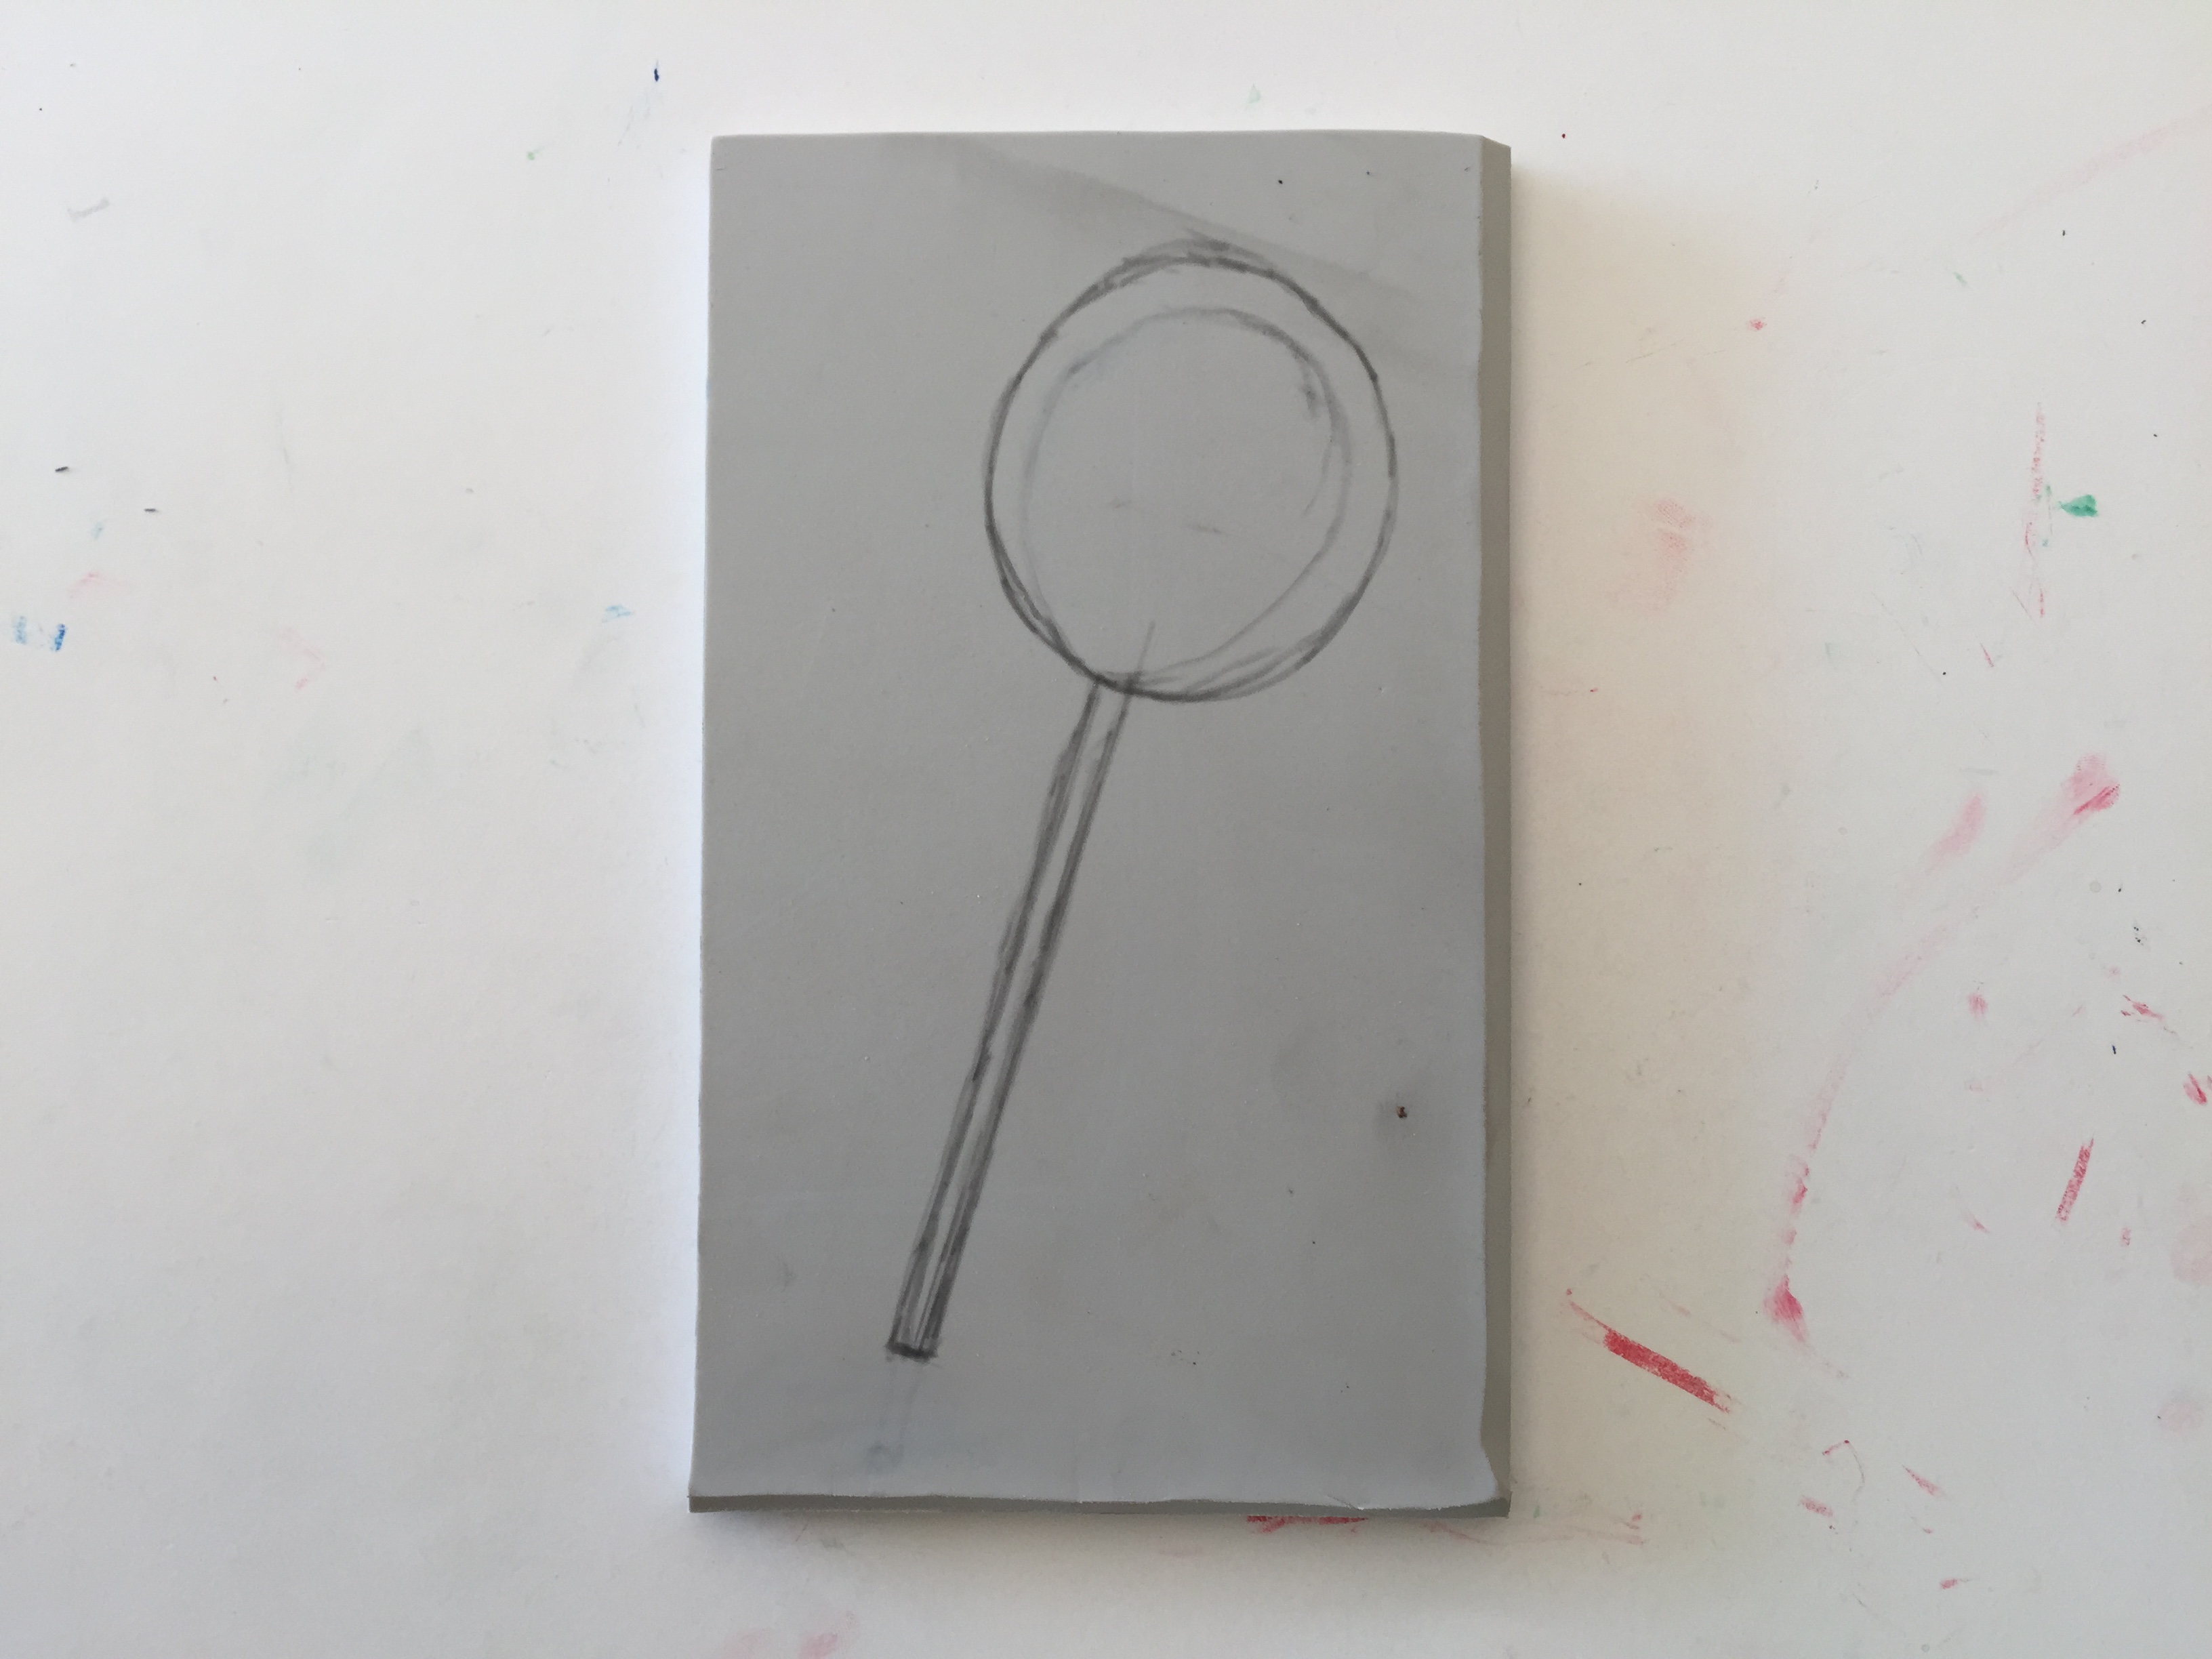 After coming up with a plan, sketch/transfer your image to the printing block using graphite transfer paper or draw directly on the block. You have to keep in mind that the image will be printed in reverse so plan accordingly, specially if your design has letters or words!
Carve-Ink-Print:


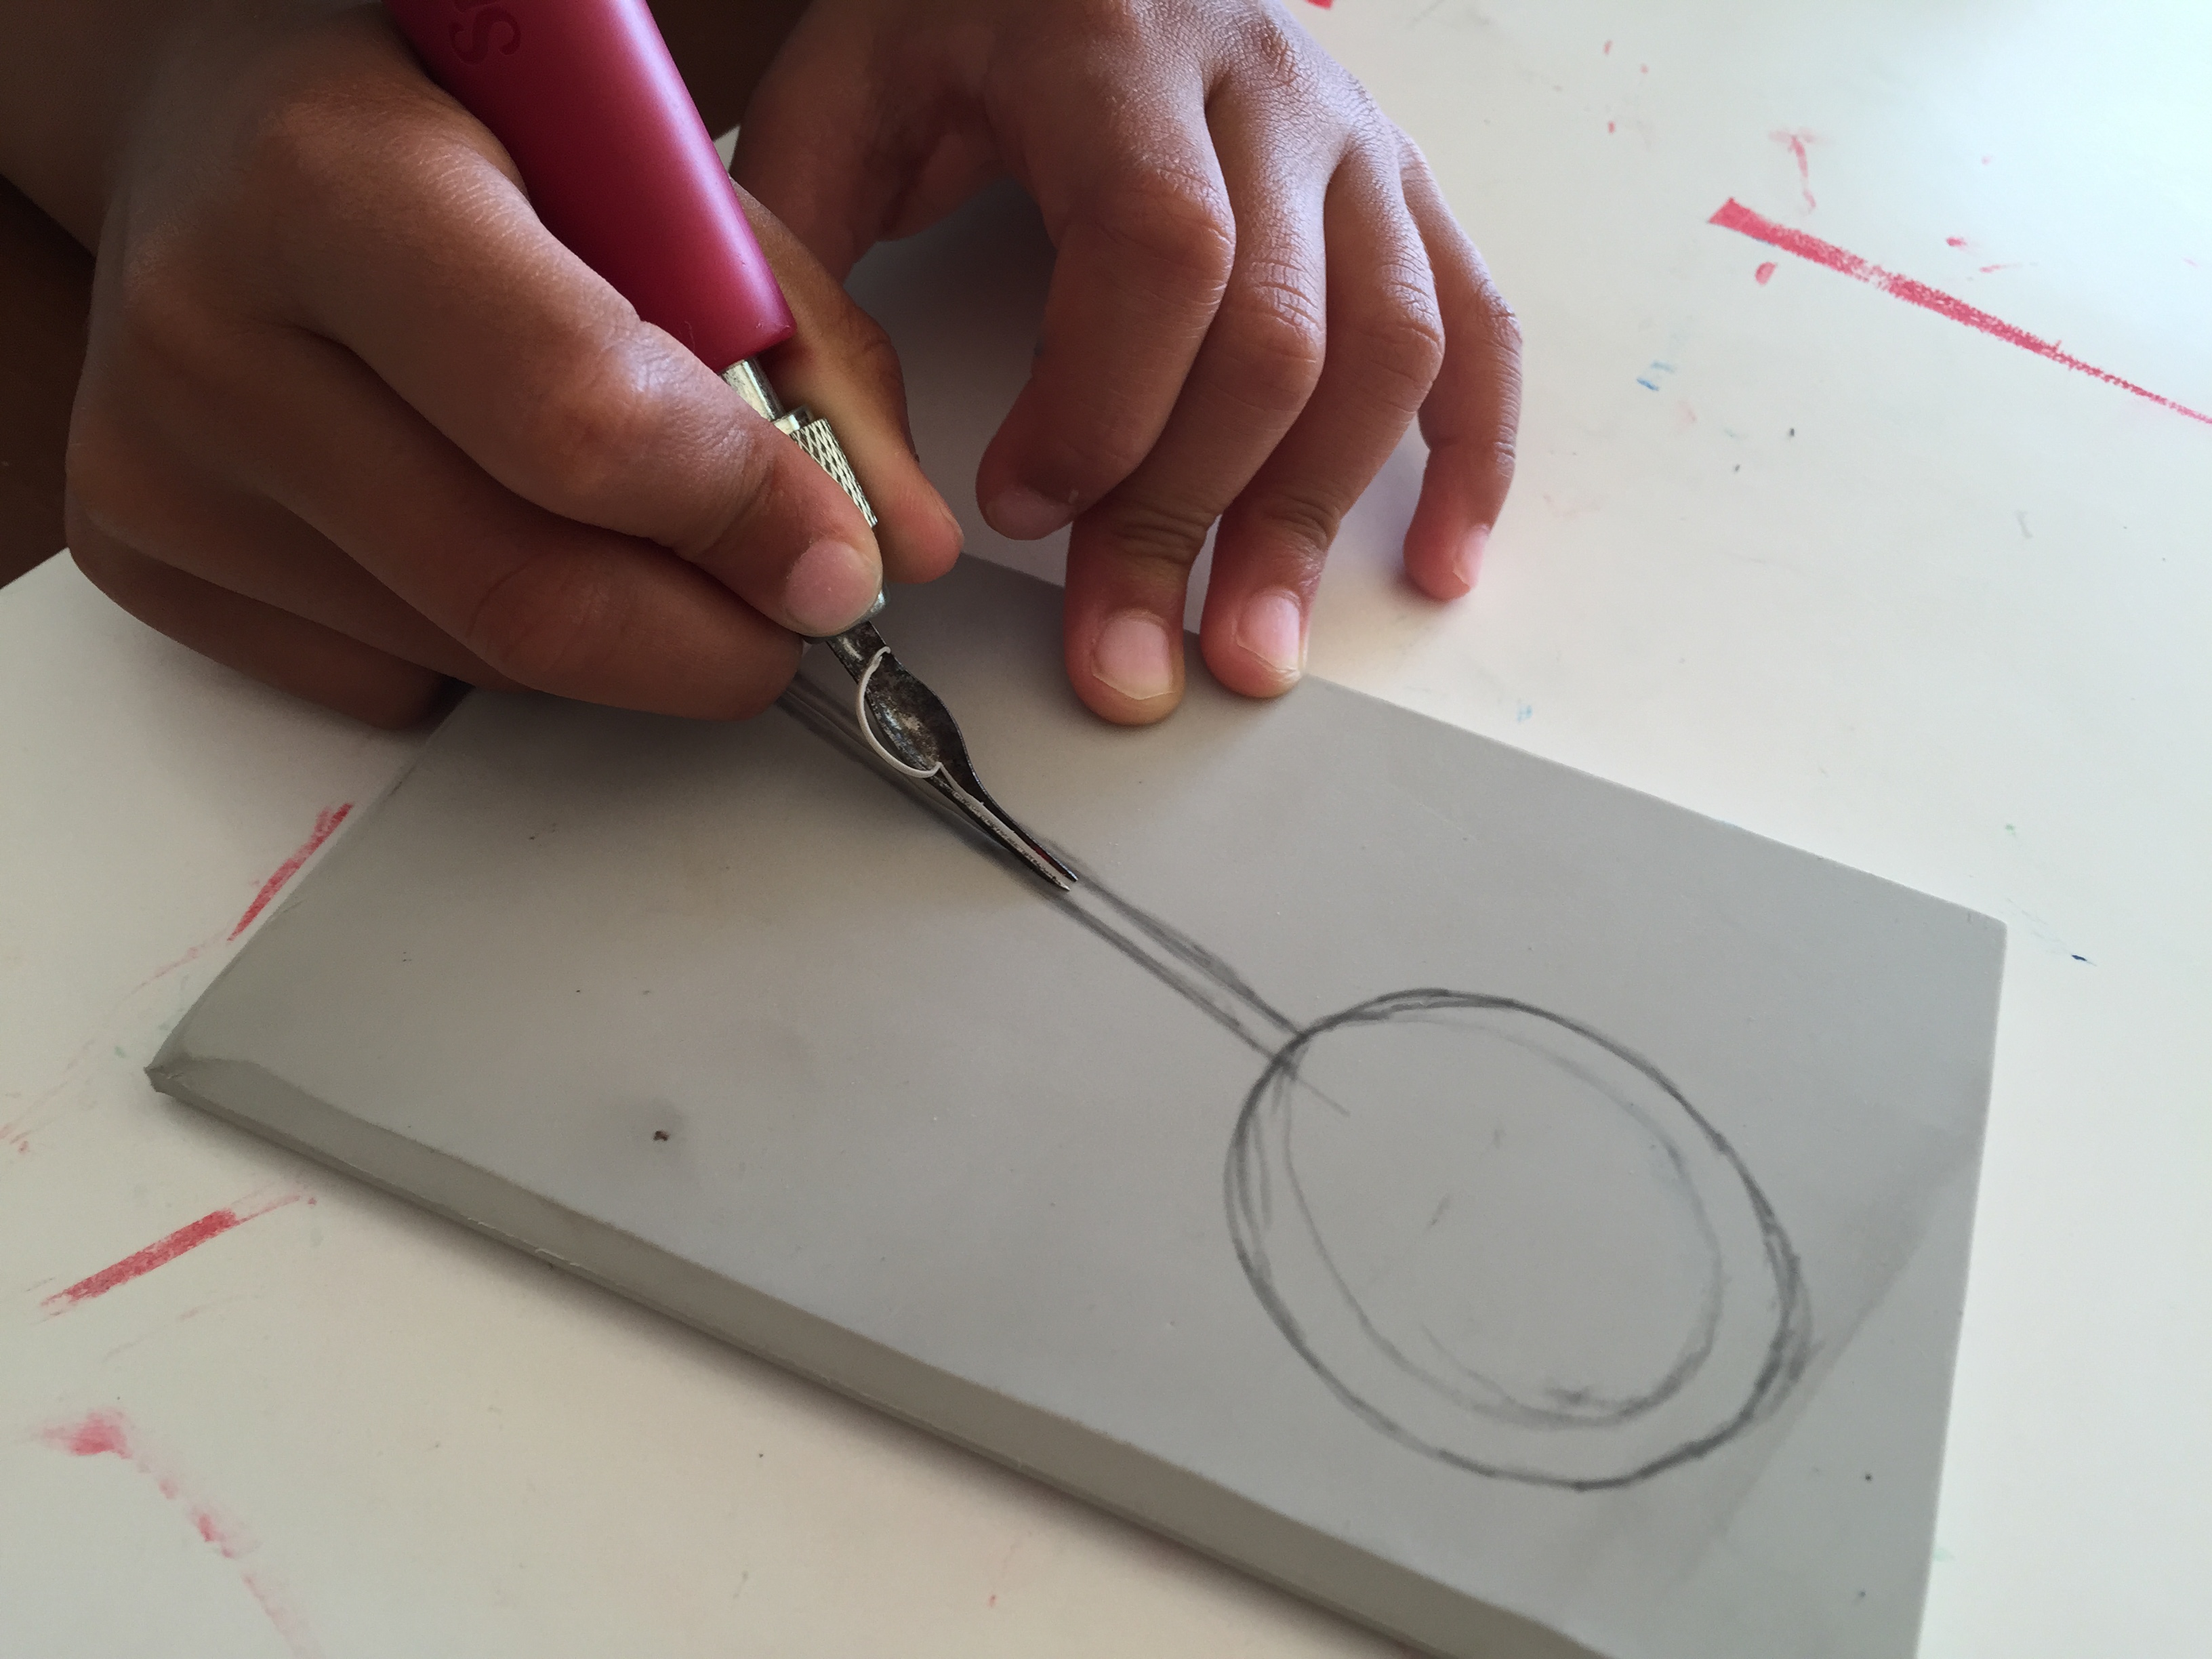
once you have carved the part you want to keep white/color of the paper, now ink the block with brayer/ink roller with the next color (in our case, it is red). Then print as many you want.
Repeat the process: Carve- Ink- Print: Now you have to carve the part you want to keep red. In her case, it is the lollipop head. So she went ahead and carved that part. Keep one thing in mind, while carving, always carve away from you for safety
The rest of the part will be printed in blue. So roll the ink on your plate. And then roll it on your block. Apply the ink in a thin even layer.

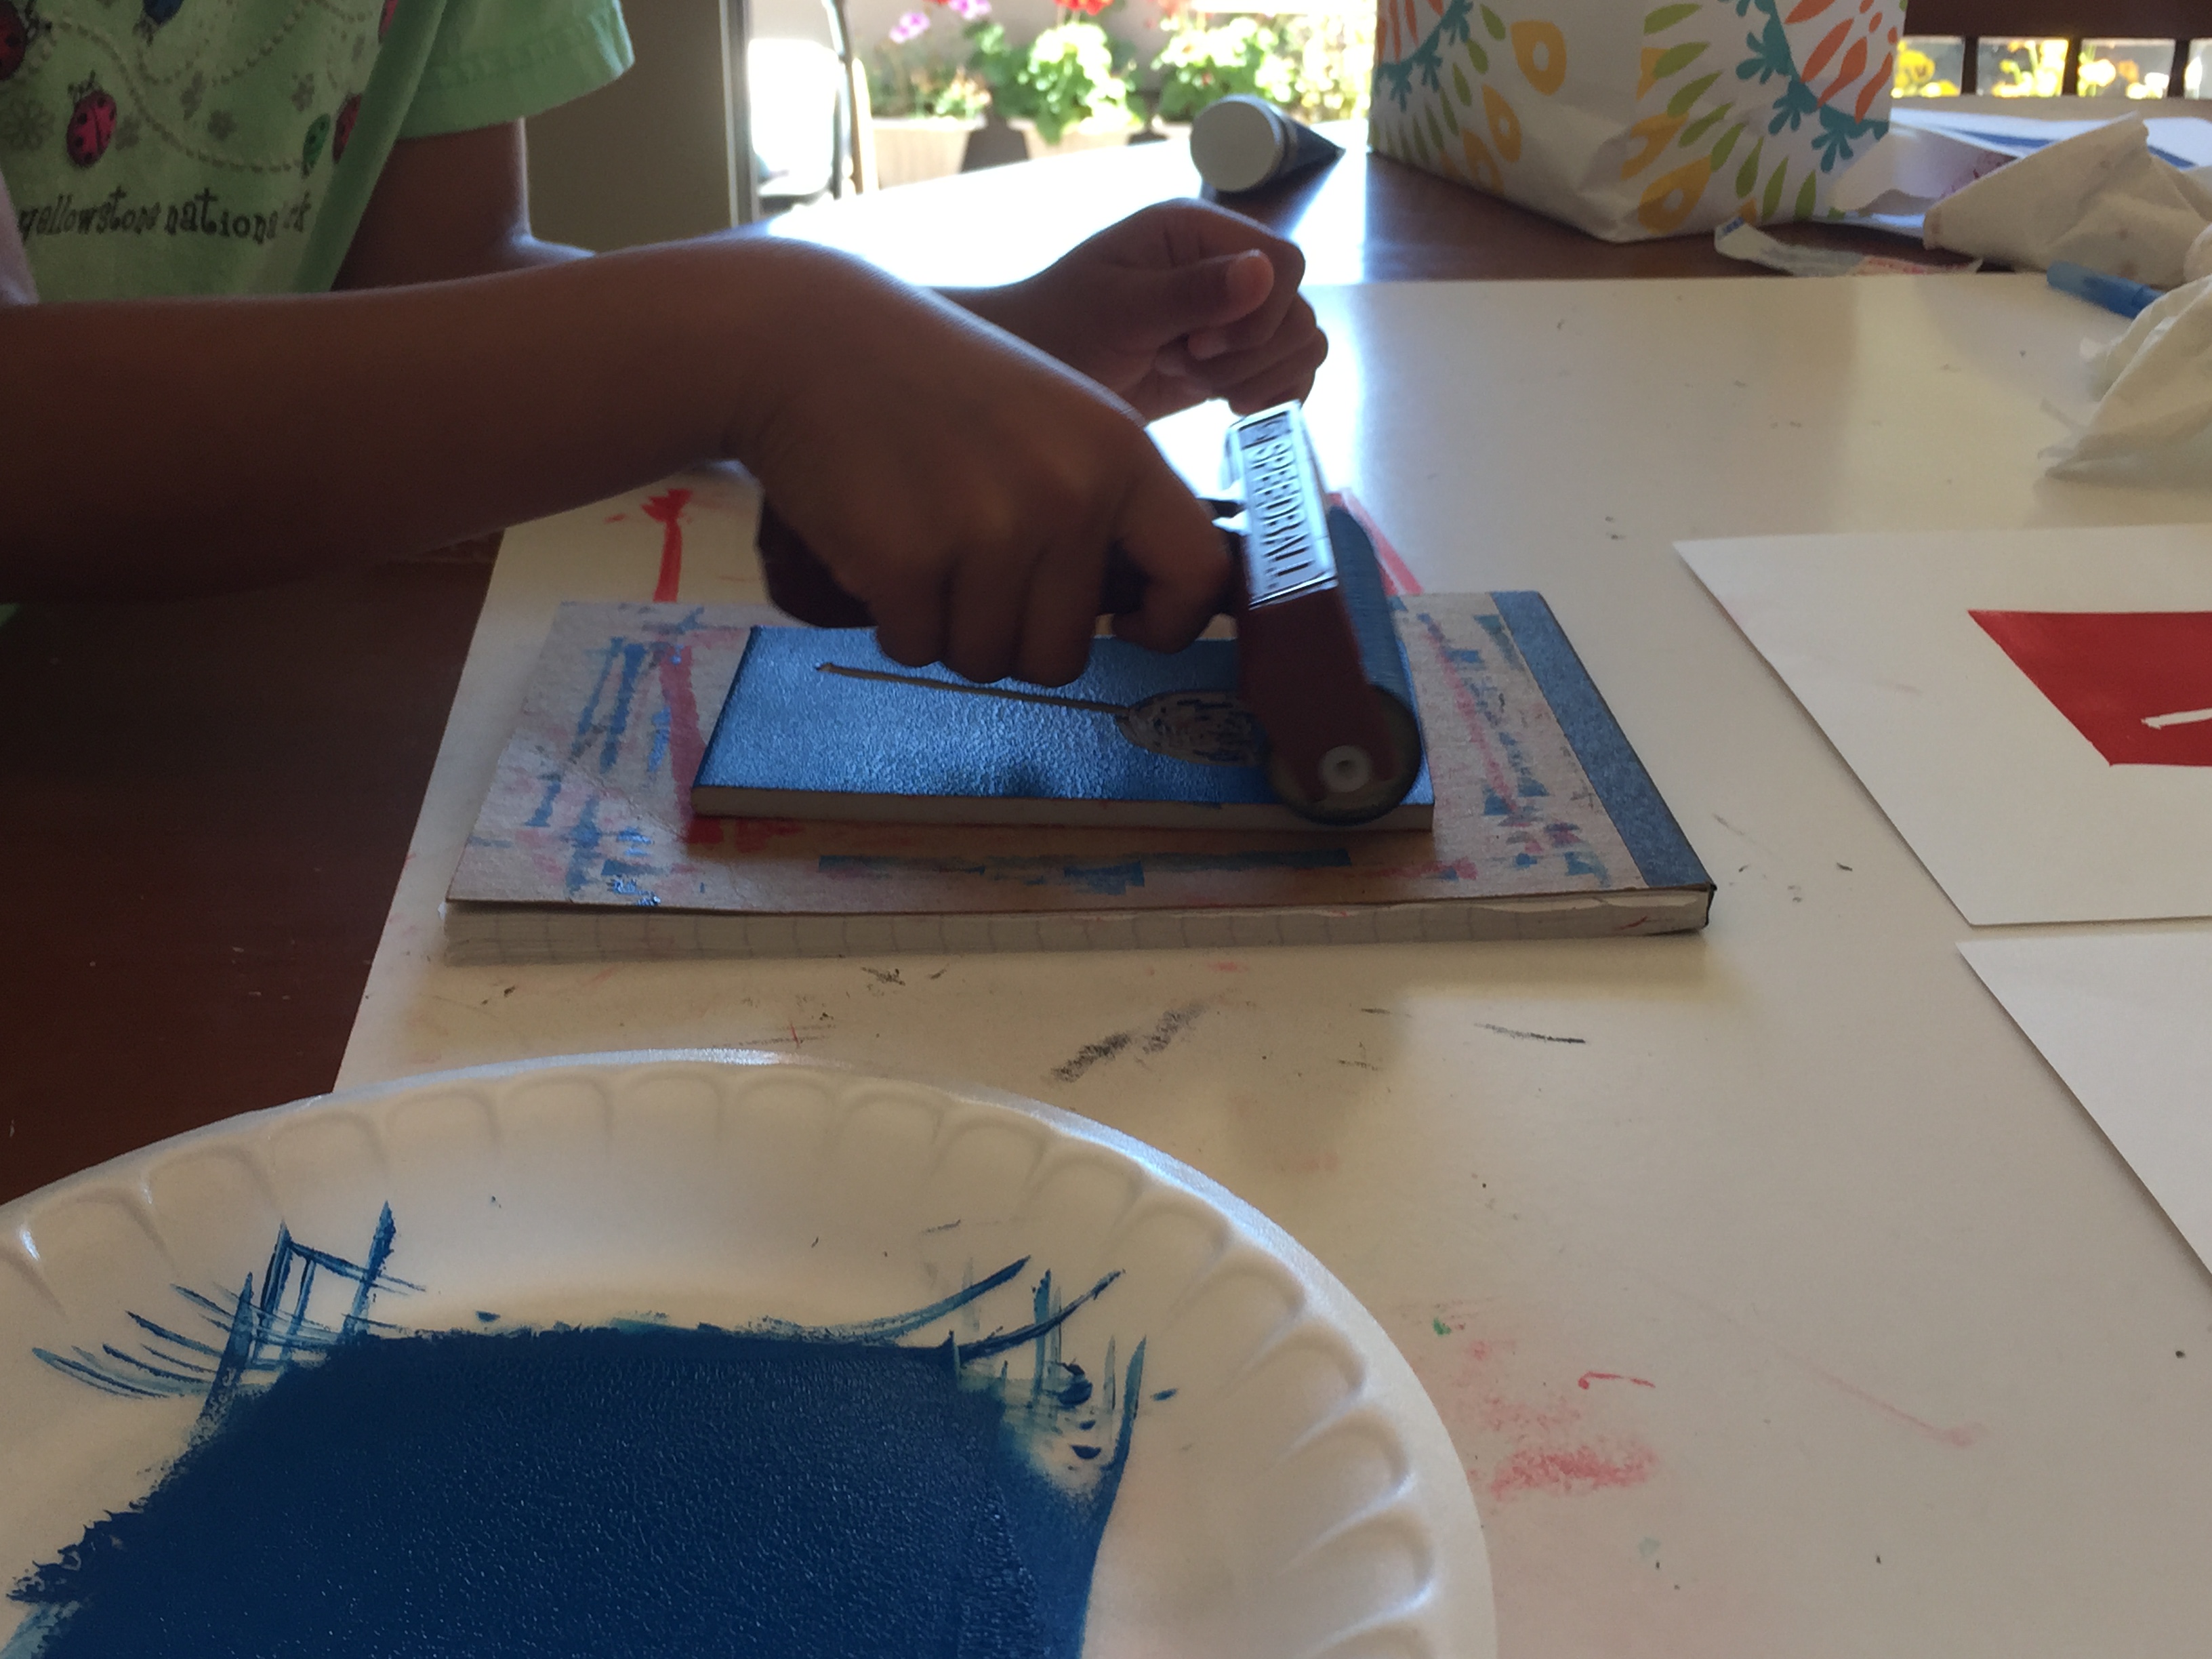
You can see that the parts which has been carved out, did not get any ink. So those areas are not going to get printed.

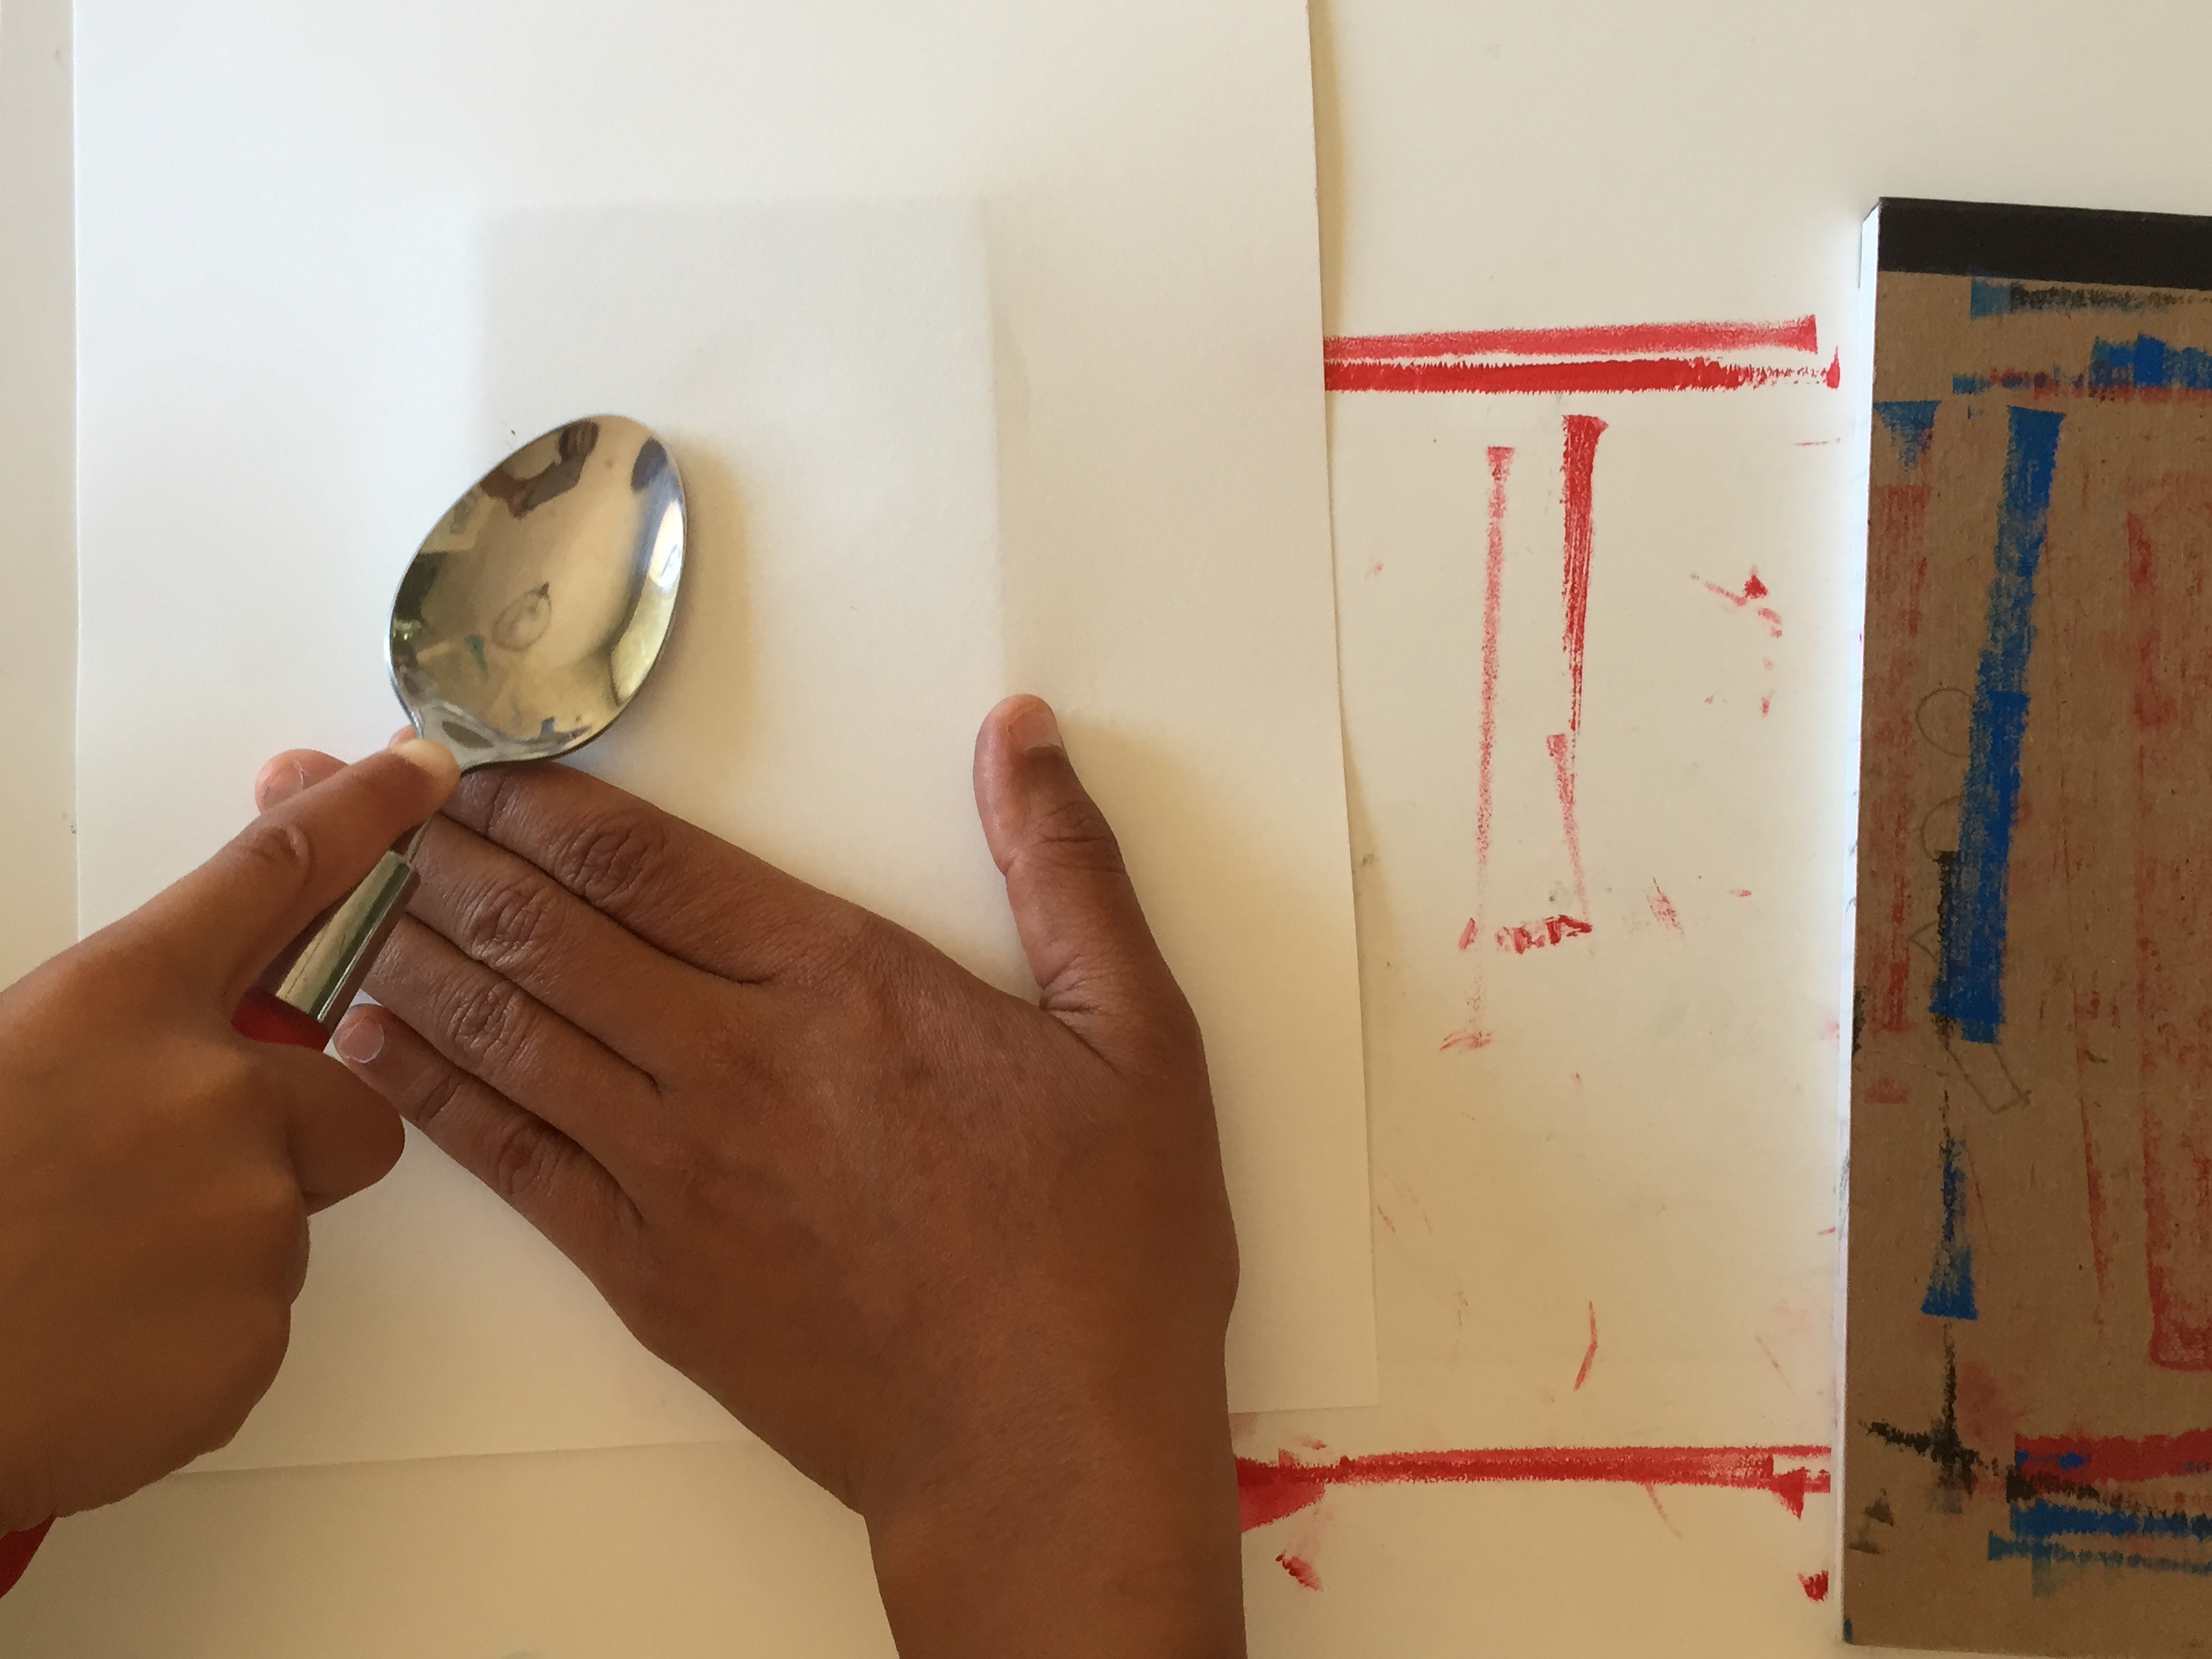
Now place the paper back on the block. Align it properly. Rub the paper with back of your spoon in circular motion. Apply even pressure so that the ink transfers to the paper from the block evenly. Also make sure your paper doesn’t shift while doing this.
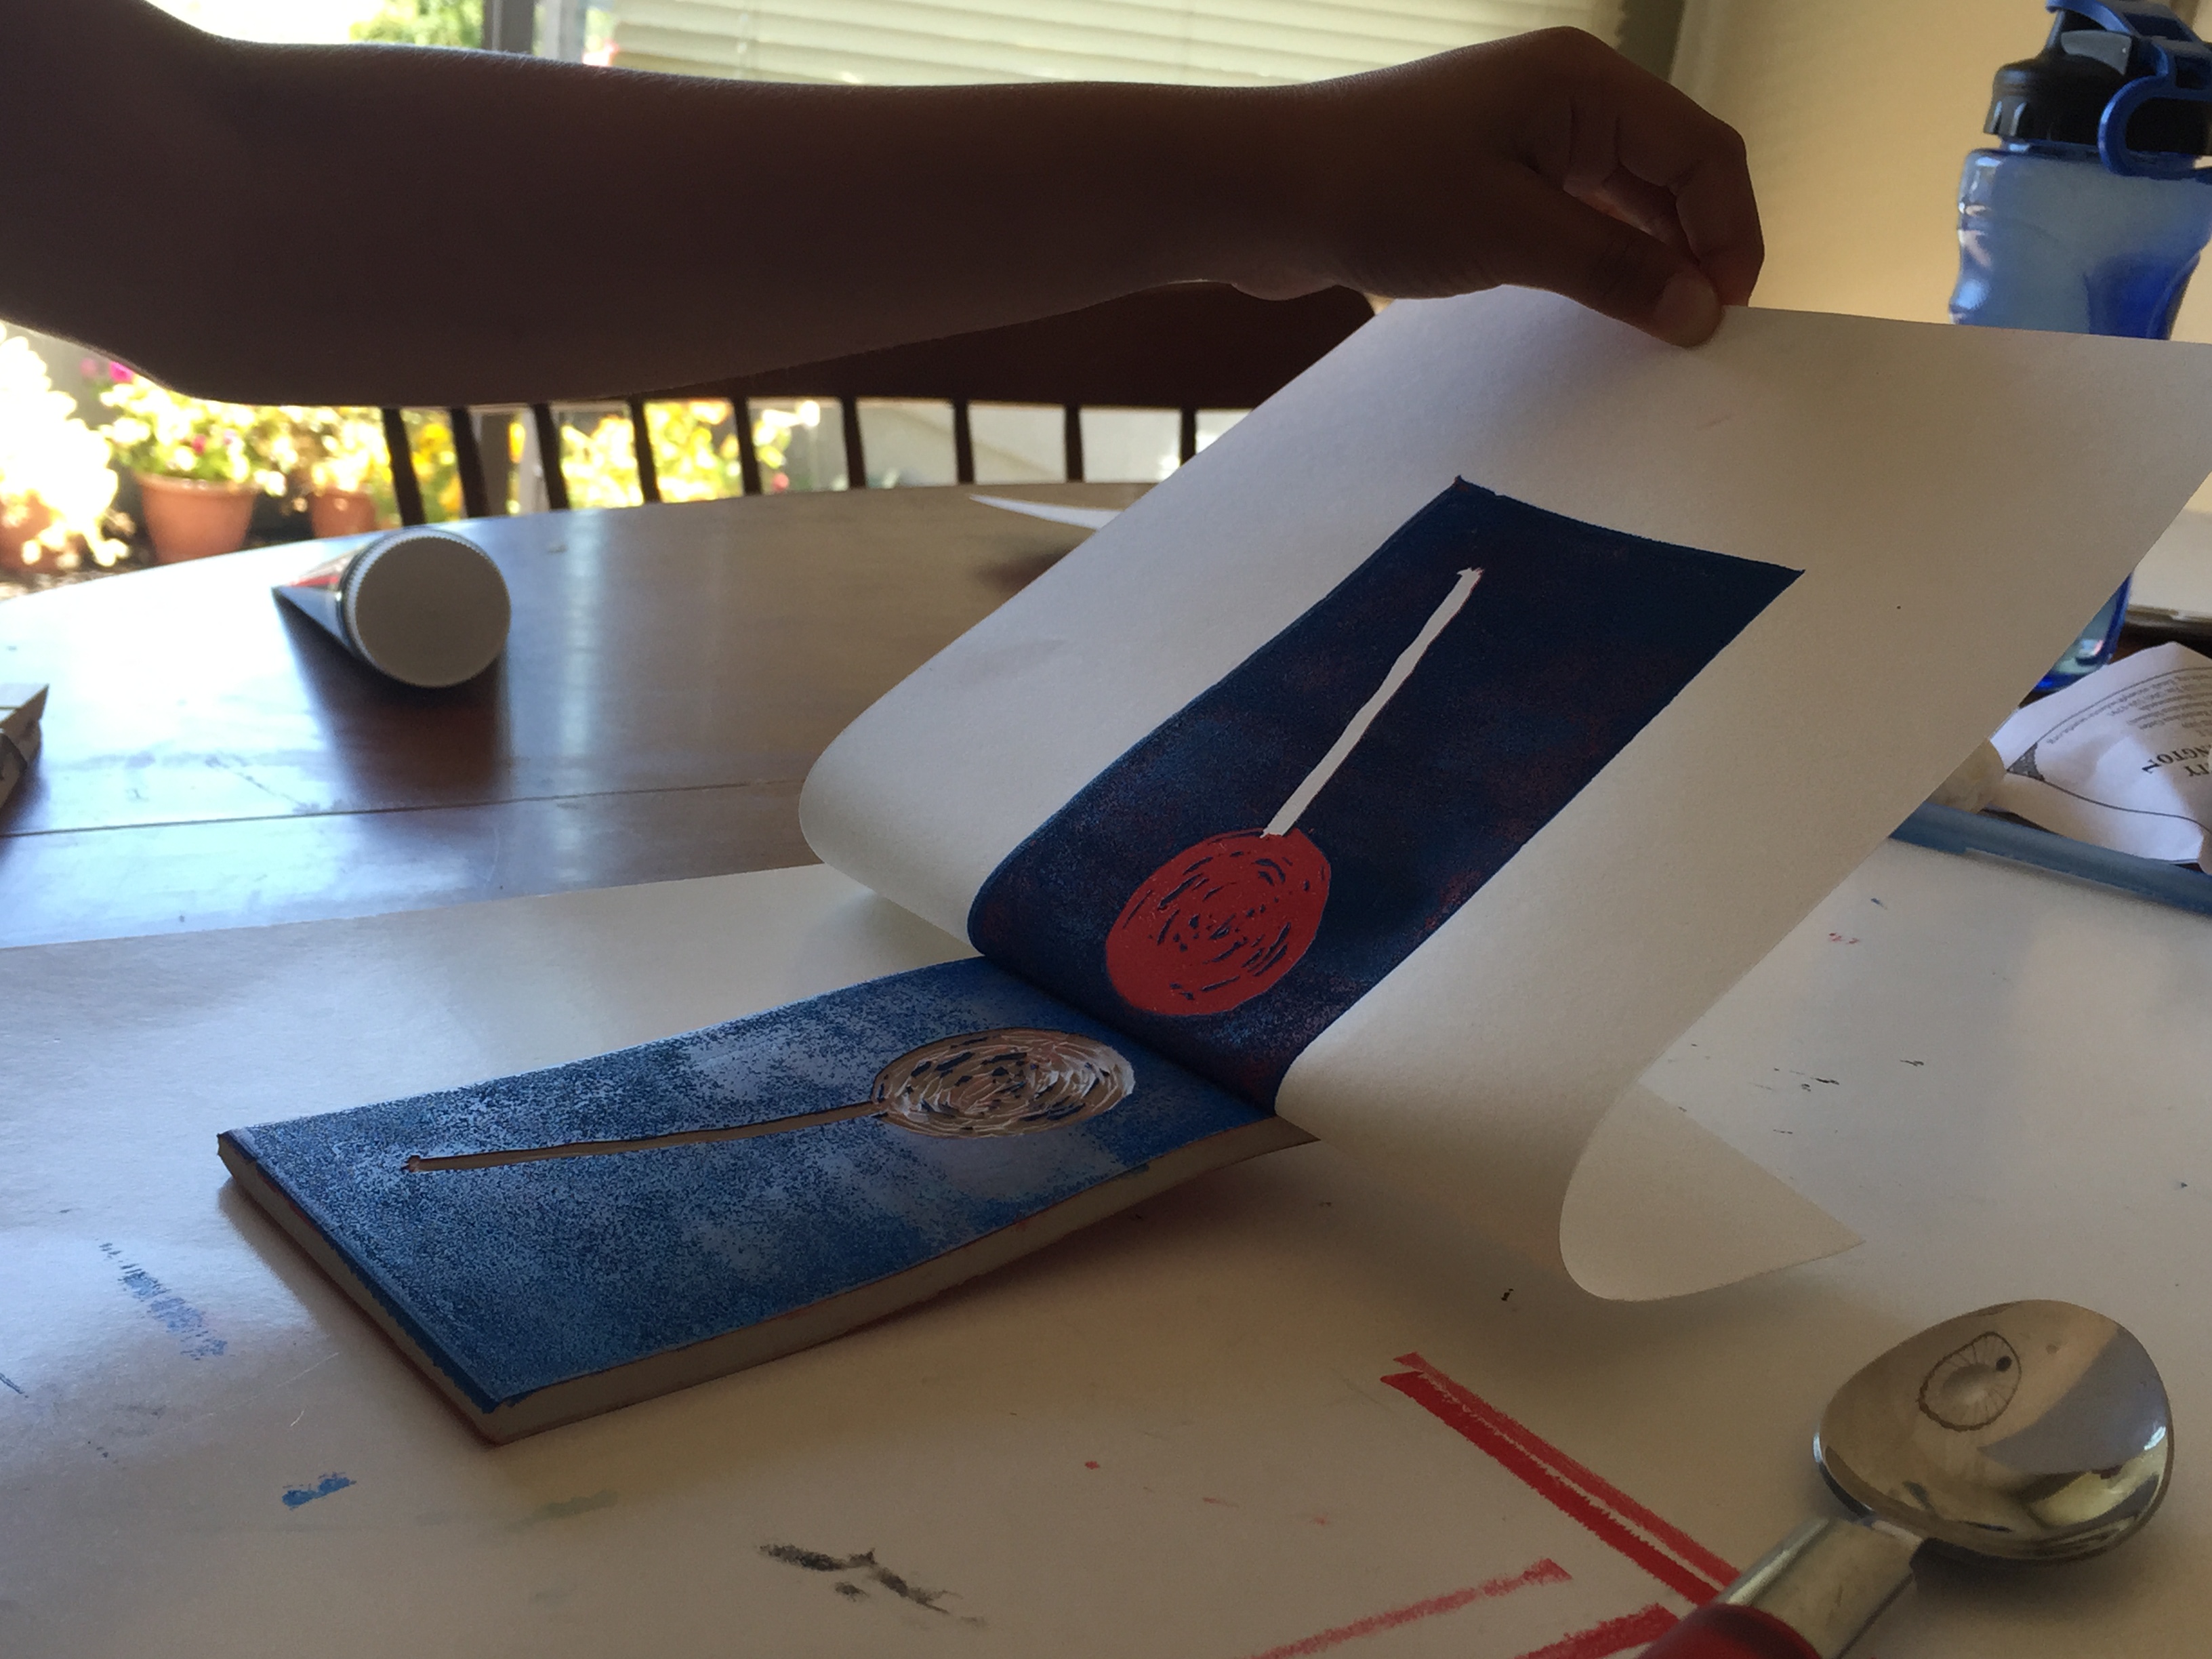
Hold your paper at one edge and lift it gently
You will see the final print revealing on the paper! Aha! The most desired moment of a print making process!!
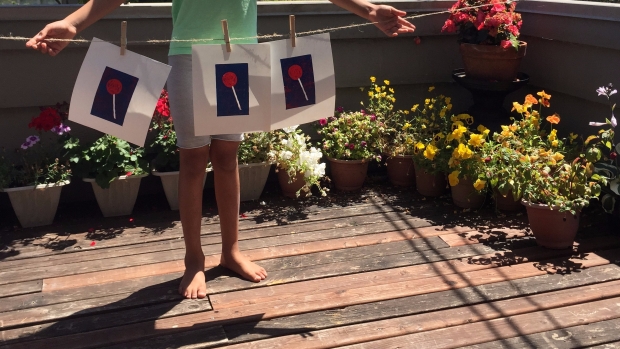
You did it! Let the prints dry.
Now ask your proud printmaker to put number(edition), date and sign his/her prints before you frame them.
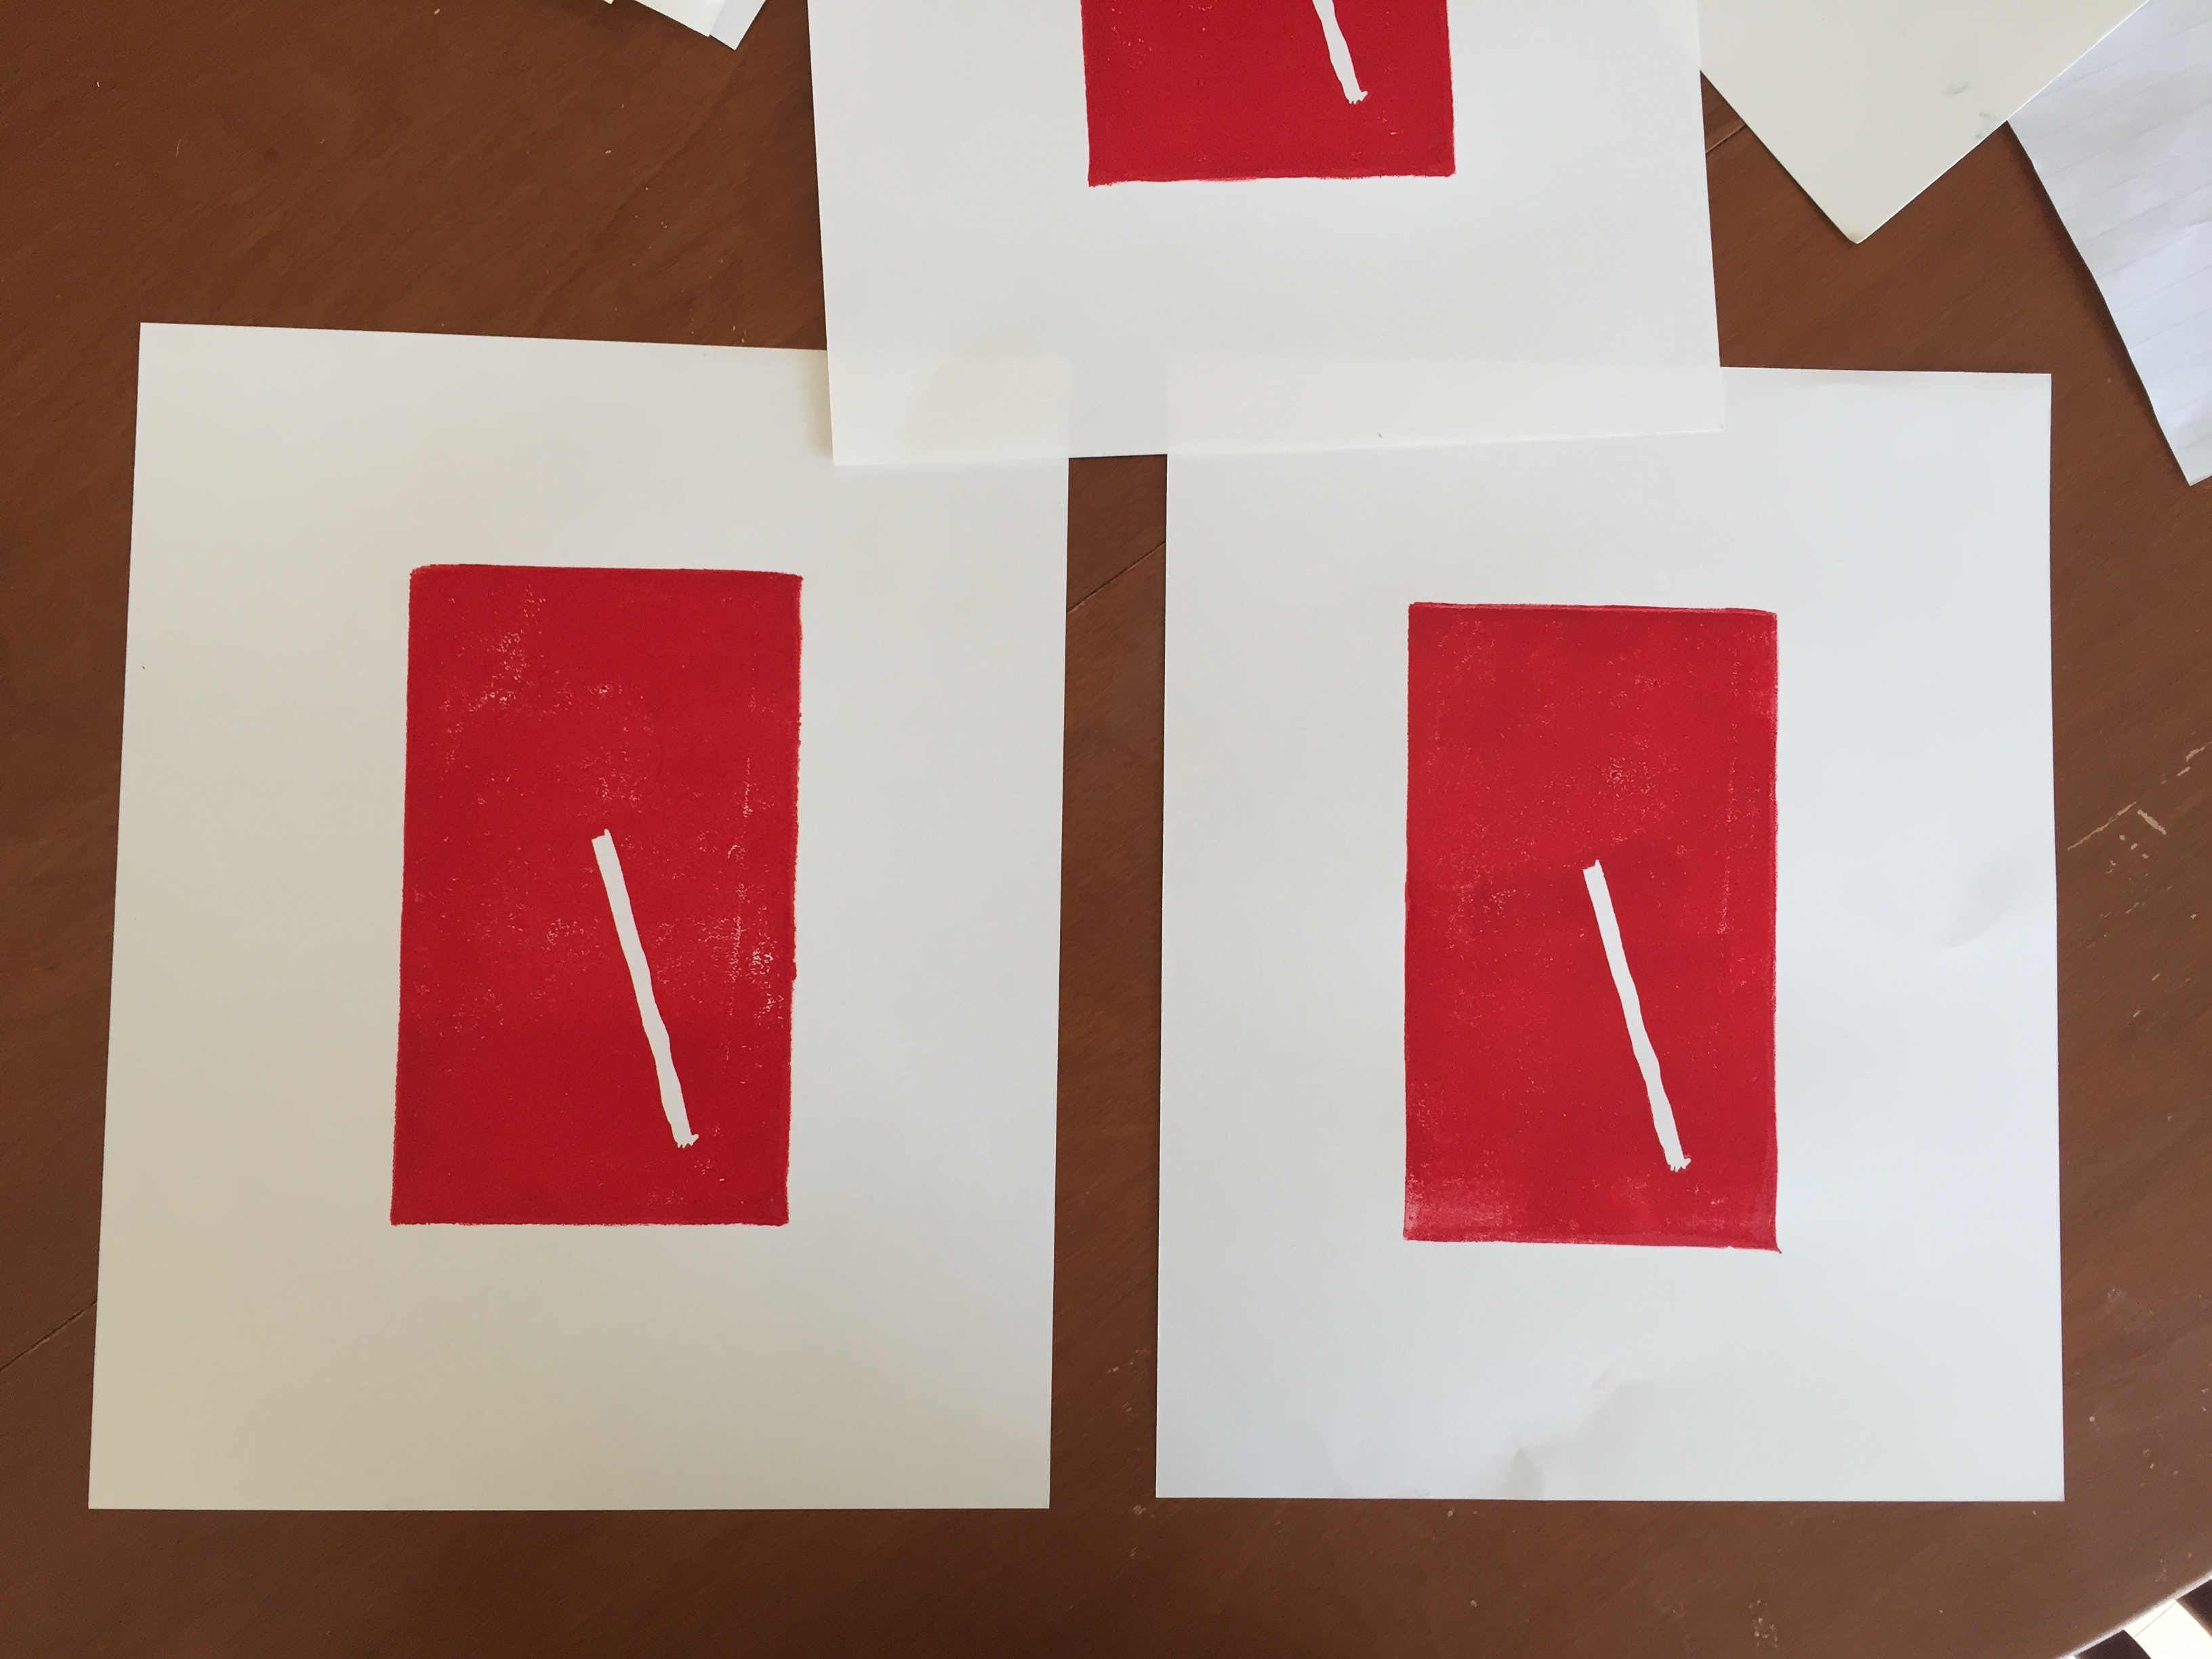
How art prints are numbered:Each impression/print is signed and numbered by the artist in pencil. Usually you can see two numbers separated by a slash (for example: 2/90). This means that the artist made total 90 prints while 2 is the specific designation for that particular impression,simply this is the 2nd print among 90 prints made by the artist.
The edition/number is written on the lower left corner of a print and lower right corner is the place for signature and date.
Wash: At the end don’t forget to WASH the roller, the block and the ink rolling plate (wash if using glass or metal plates, throw away if you have used a foam plate like us)

You can see among these two prints, the second one came out blotchy. Either the ink has not been rolled on the block evenly or the pressure was not even while rubbing the paper to transfer ink from block to paper. But the first print came out pretty good as ink and pressure was evenly applied.

Also, the little circular blue marks on the lollipop head gives it a nice dimension and creates an illusion of transparency which I liked the most.
Hope you understand the process and inspired to try it. Shortly we will bring more tutorials/lessons on printmaking. By the time, get your materials!

Wonderful Shruti!!
LikeLike