
Category: Festivals

Happy Halloween and a no sew DIY Jellyfish costume
 The conversation and planning was on the dinner table for couple of days since she got the idea from a classmate. But it was just yesterday night we started making it! All I knew was that she wanted to be a jellyfish! Awww…I was like pulling my hair…how to do that! (Well, did I mention that so far we never bought any Halloween costumes! Every year we make it ourselves!) And the solution came from her! Ma, you just need few streamers to attach to an umbrella. Hmm …that sounds pretty smart, simple and doable! Well, if you are making it the night before Halloween, you cannot go for an elaborate plan. So I kept it very very simple. But at the end she turned into such a cute jellyfish that I cannot wait to share it with you! And the best part is, there is no sewing involved. If you have a child who is always up for DIY costumes, this should be in your list! I know you are out for Trick or Treating when I am writing this post, so save this for next time!!
This is the first year she has gone for trick or treating with her friends. Nothing can beat the fun of going for “Trick of Treat”ing with bunch of friends (dressed in funny/scary/cute costumes) and come back with loads of candies. To add to that, what fun is it when you can tell your friends that you made your own costume?
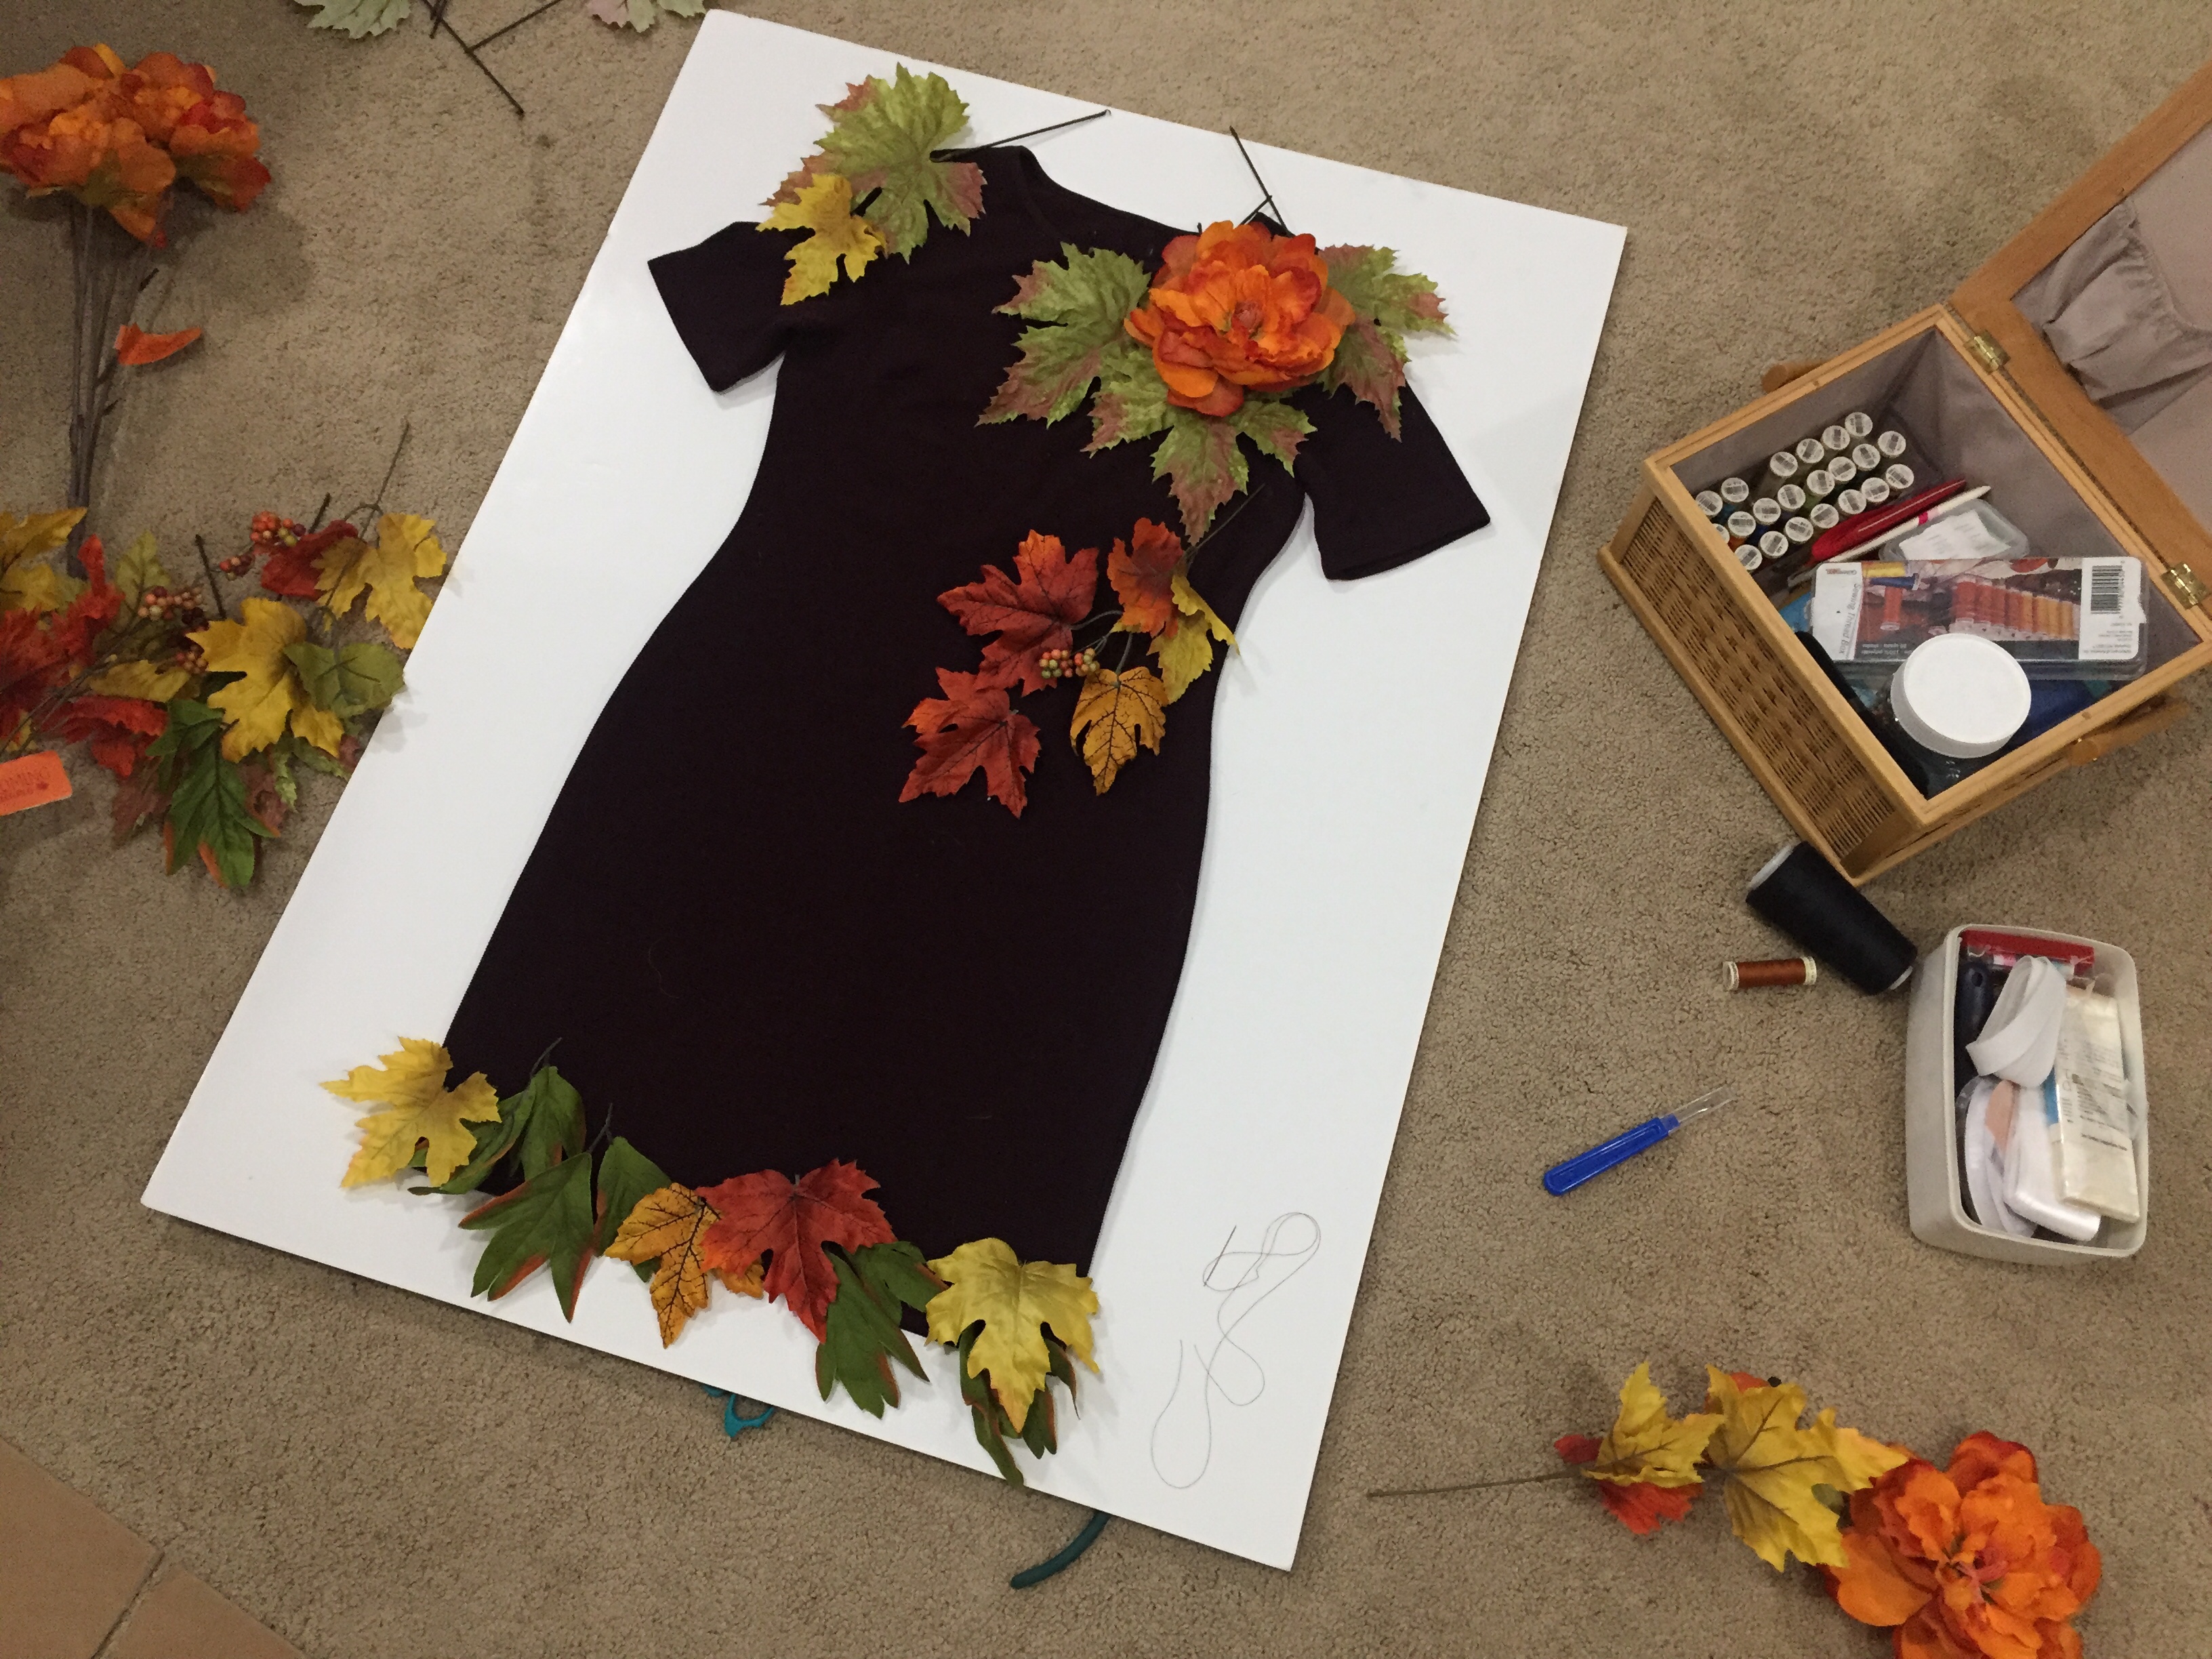
So, here is the material list:

- A clear umbrella (best if you have the dome one, if not, just use whatever available. We used a regular clear/transparent umbrella)
- Fine net Tulle fabric- 3yd
- Stiff net Tulle fabric-1yd
- 2 inch wide white gift wrap ribbon of your choice
- Scissor
- Hot glue gun
How to do it:
- Ask your child to stand holding the umbrella and measure the length from the edge of the umbrella to her ankle.
- Cut 3 inch wide ribbons from the fine net tulle and the stiff net tulle. Length of these pieces would be the length you just measured (edge of umbrella to ankle)
- take one piece of the fine net tulle and keep tying it tightly to the end of the spikes of the umbrella. This will be the place where we will attach/tie/glue all the other ribbons. So nothing is directly tied/glued to the umbrella. And you can have your umbrella back the next day!! In Seattle you cannot loose your umbrella for anything!

- Cut the gift wrap ribbon into 8 pieces. These pieces would be a little smaller than the tulle ribbons.
- Once you have tied one ribbon all around the edge of the umbrella, now start tying all the other tulle ribbons (3 inch wide ones we just made) and the gift wrap ribbons. Tie them in any order you want. We tied 4 fine net tulle ribbon near each spike. Then added one stiff net tulle ribbon and one regular gift wrap ribbon ( we used hot glue gun to glue the gift wrap ribbon) in between two spikes.


Once you are done tying all the ribbons, wrap another fine net tulle ribbon loosely around the edge of the umbrella.
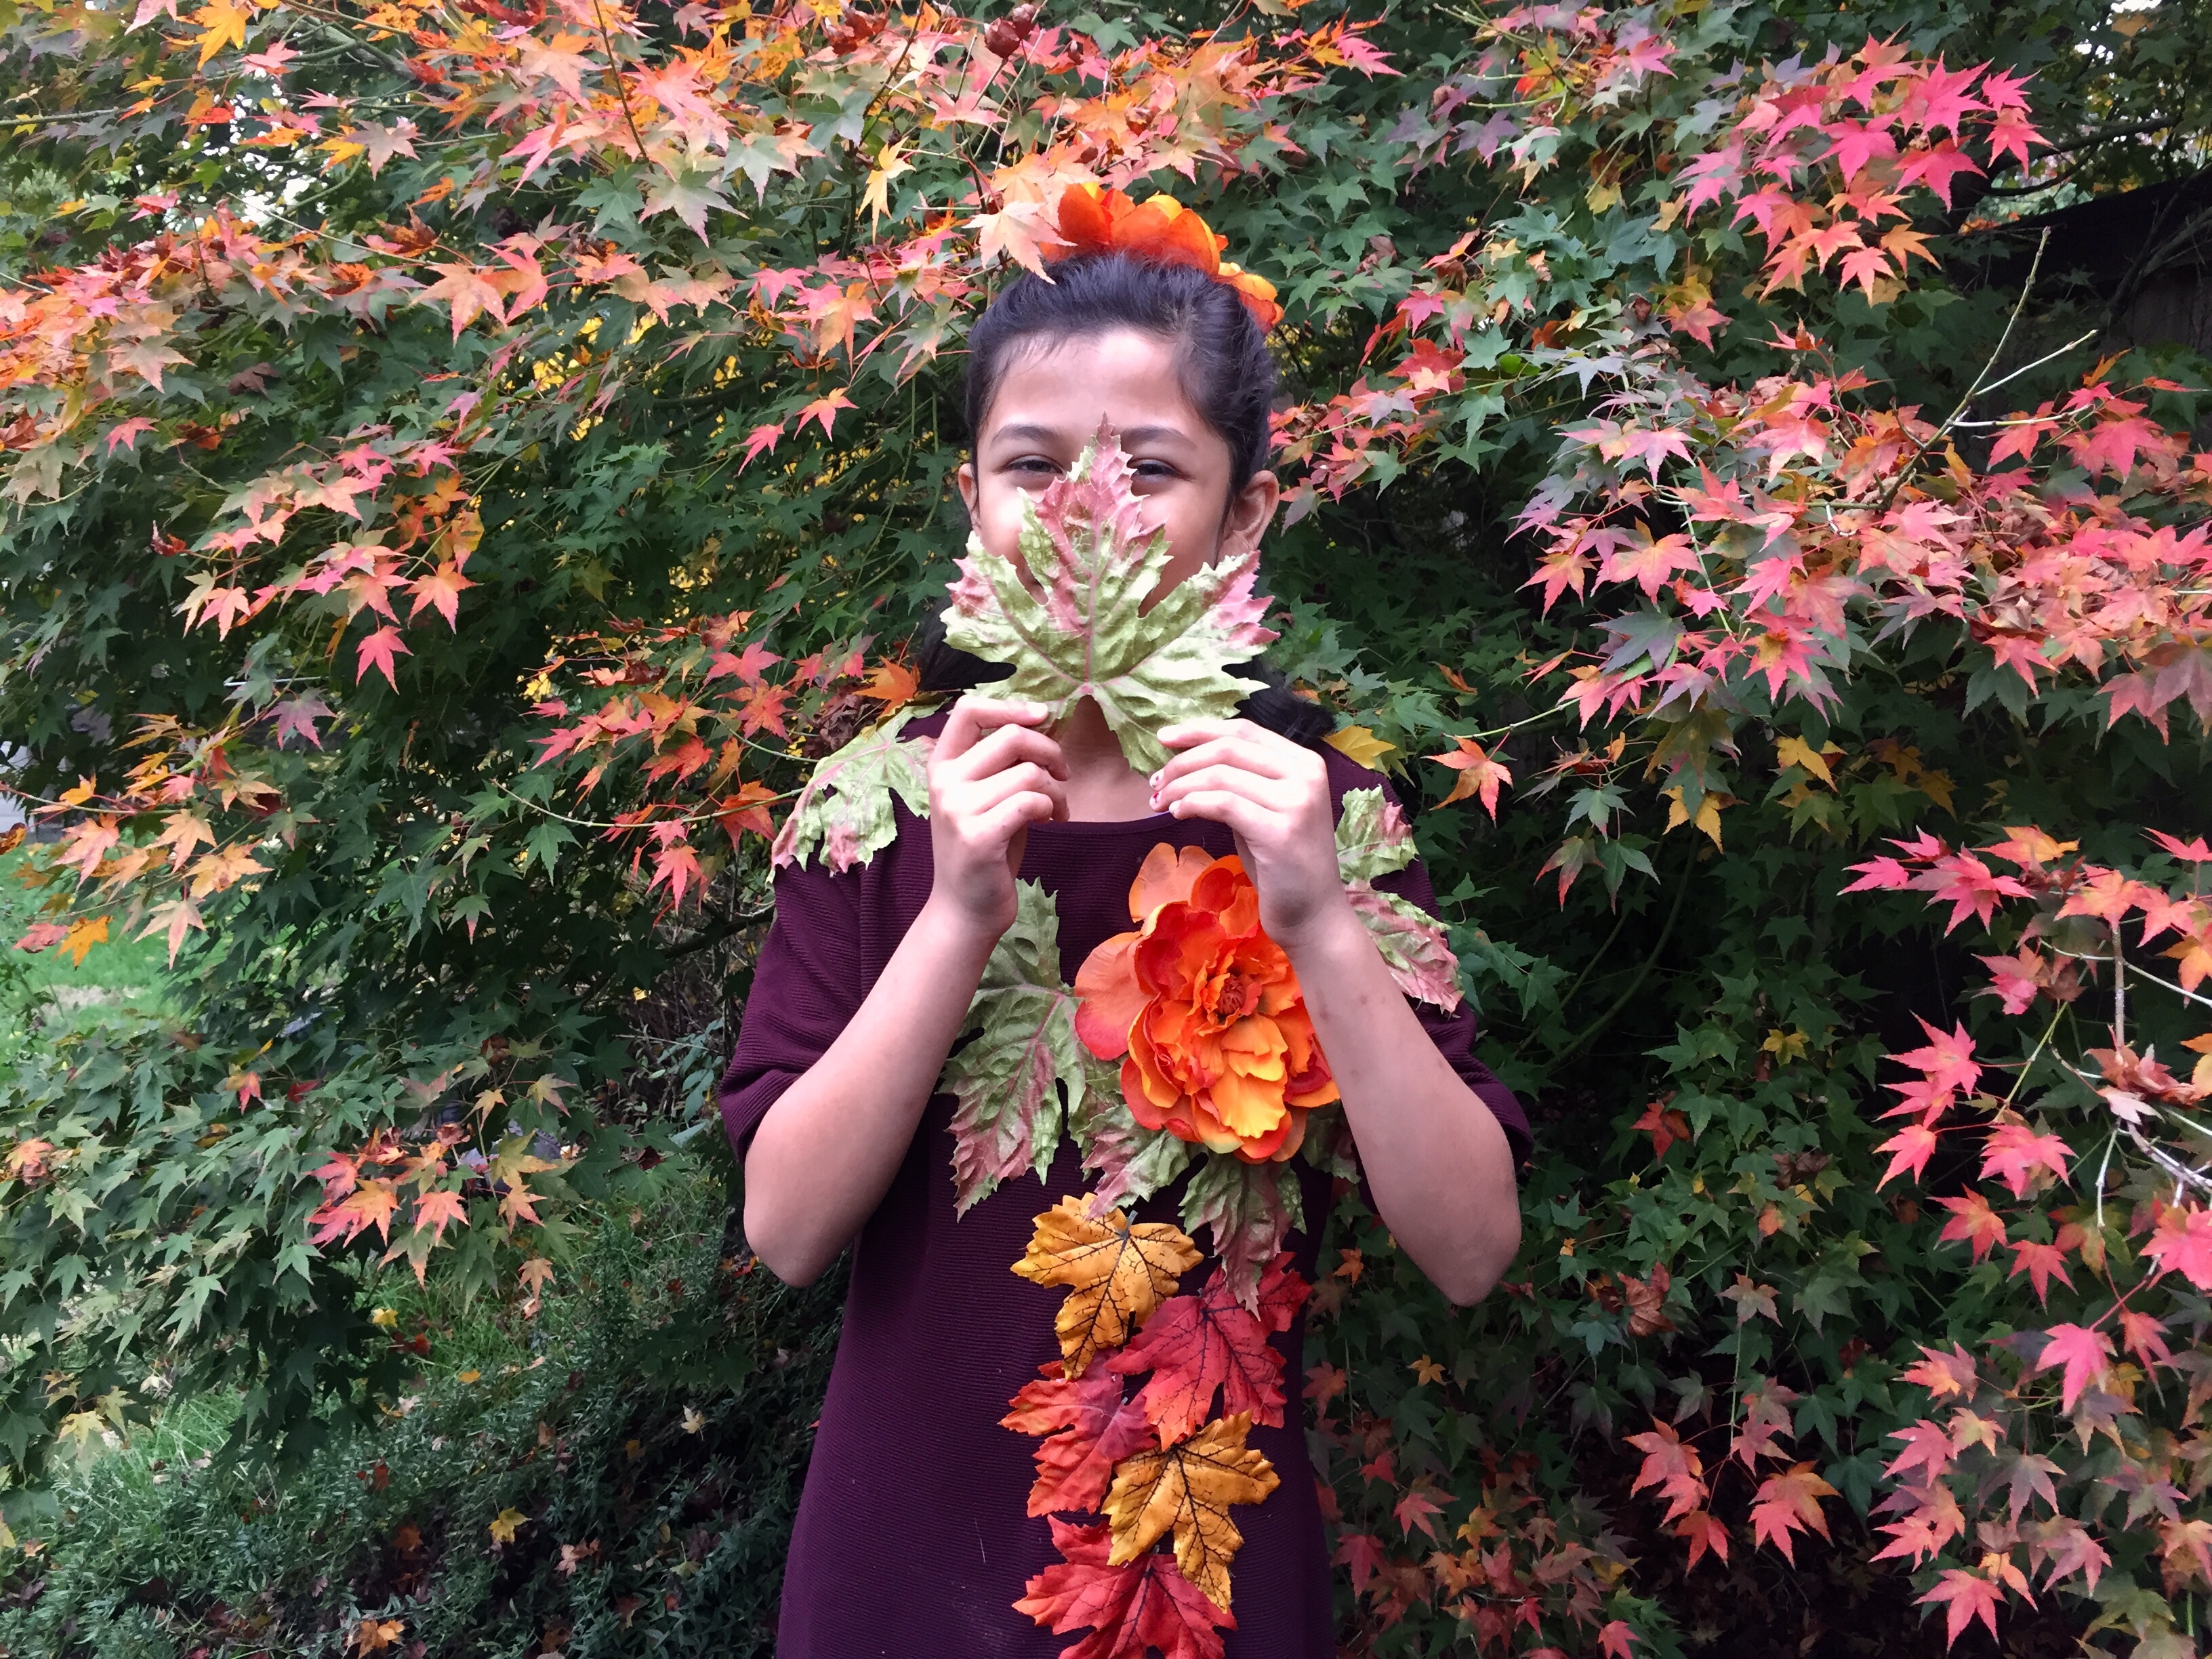
- Wear a white or sea green dress and hold the umbrella with tentacles !

- Voila! Now you have one cute and proud jellyfish!!
I cut all the pieces for her and she tied and glued them all to the umbrella. It is that simple!!
Hope to see you/ your child as a jellyfish next time!
Rangoli-the art of the moment: A tutorial on making your own design
Growing up in a small town in Bengal, Diwali was always the day of Kalipujo! While the rest of India celebrates Diwali, the eastern part of the country (mostly West Bengal, Orissa, Tripura and Assam) celebrates another festival named Kalipuja, which falls on the same day as Diwali. Goddess Kali is worshiped on this day.
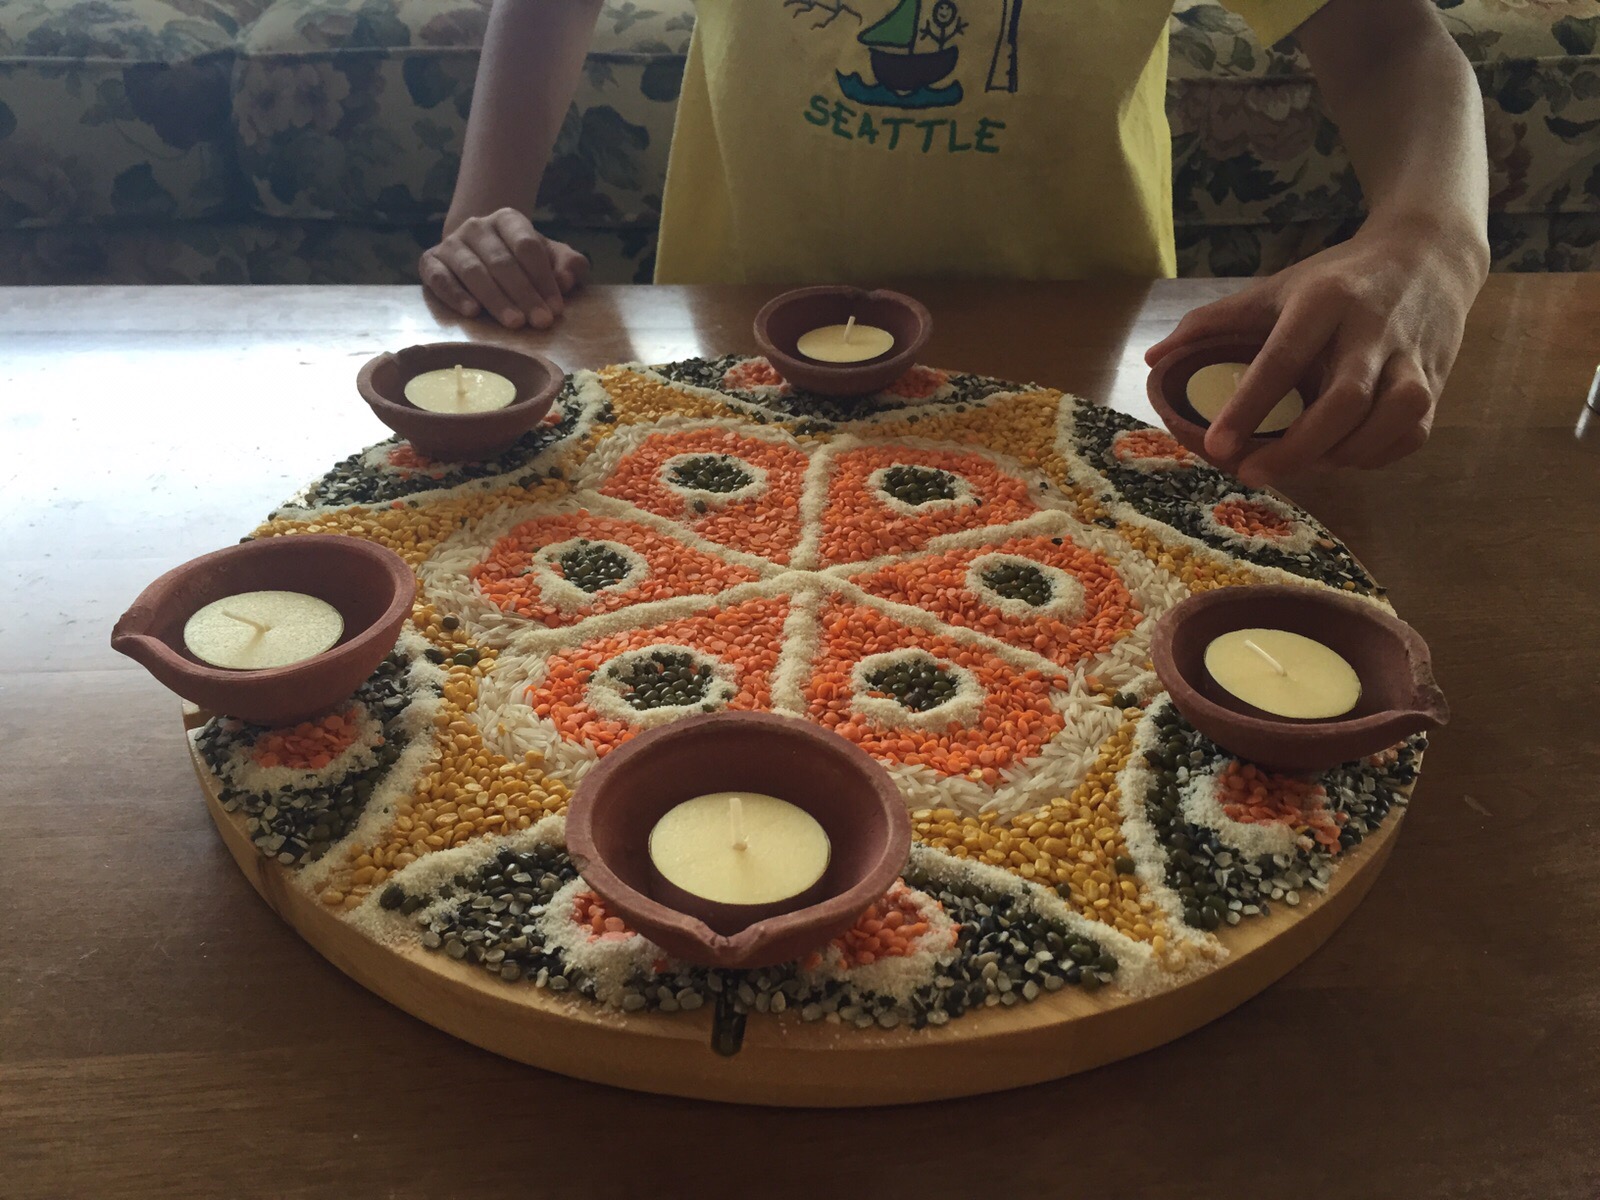
On that evening Didi (my sister) and I used to walk with a handful of slim white candles and a matchbox on the soft cold grass in our front yard. And soon we used to turn the iron fence around the green front yard into a magic-land with row of lights flickering in autumn breeze! By this time Maa would have brought the pradeeps (clay lamps) to put in the main entrance and we used to run to the terrace to lit candles all around it. Now you can imagine how beautiful it used to look!
So, for me it was those flickering slim white candles and clay lamps that was the part of festivity of that night. Diwali in its festive glory entered later in my life, with our daughter during our stay in Mumbai! The city, the people, and friends introduced us to Diwali! And the first thing that came with Diwali was the Rangoli!
 Diwali, the festival of lights is the most joyful and brightest among all Indian festivals. It celebrates the triumph of good over evil and light over dark. On the first day of this 5 day long festival people worship Goddess Laxmi, the goddess of wealth and prosperity and welcomes her home with symbolic footprints, Rangoli (colorful pattern made on floor) and pradeep/diyas (clay lamps).


Over the time, when we started living in a different country we hardly get to experience either Kalipujo or Diwali. But wherever we live, we at least celebrate this festival every year simply by making a Rangoli with our daughter and putting candles on it. I don’t know how but this simple thing brightens our life in many folds.
What is a Rangoli?
Rangoli is a colorful pattern created on floor using colored sand, powdered rice, colored rice, dry flour or flower petals. Rangoli designs can be simple or elaborate geometric shapes to flower petal patterns and even images of deities. It could be of any size ranging from as small as a placemat to as big as a room. Sometimes for making bigger Rangoli, people gather together and have fun making it as a group activity. But the best part of it is, it is the art of the moment. People can start making it without any preoccupied ideas or plan and can develop/create the design as she/he progresses. Much like life and culture the dynamic nature of it is what attracts me the most.
Can you make your own design for the Rangoli? – Yes of course!.
I will be sharing few basic ideas which will help you to create your own Rangoli designs. I have noticed people looking for ideas or designs in the internet when they are making Rangoli. So one hand is busy looking at a design on screen and the other busy in copying that. But why do we need to do that? Believe me! You are way more creative than that! If you feel like you are going to mess up with the proportions while drawing your design, a grid can come handy! If you make a grid on your working area and start drawing your design using the grid as your guideline, you and your child can create your own beautiful designs very easily. You are now becoming the part of the tradition which has been practiced for hundreds of years. I would highly recommend practicing the designs on a graph paper or on any paper and make your own grid as guide. Here are the example of two grids which will enable you to create hundreds of unique designs.
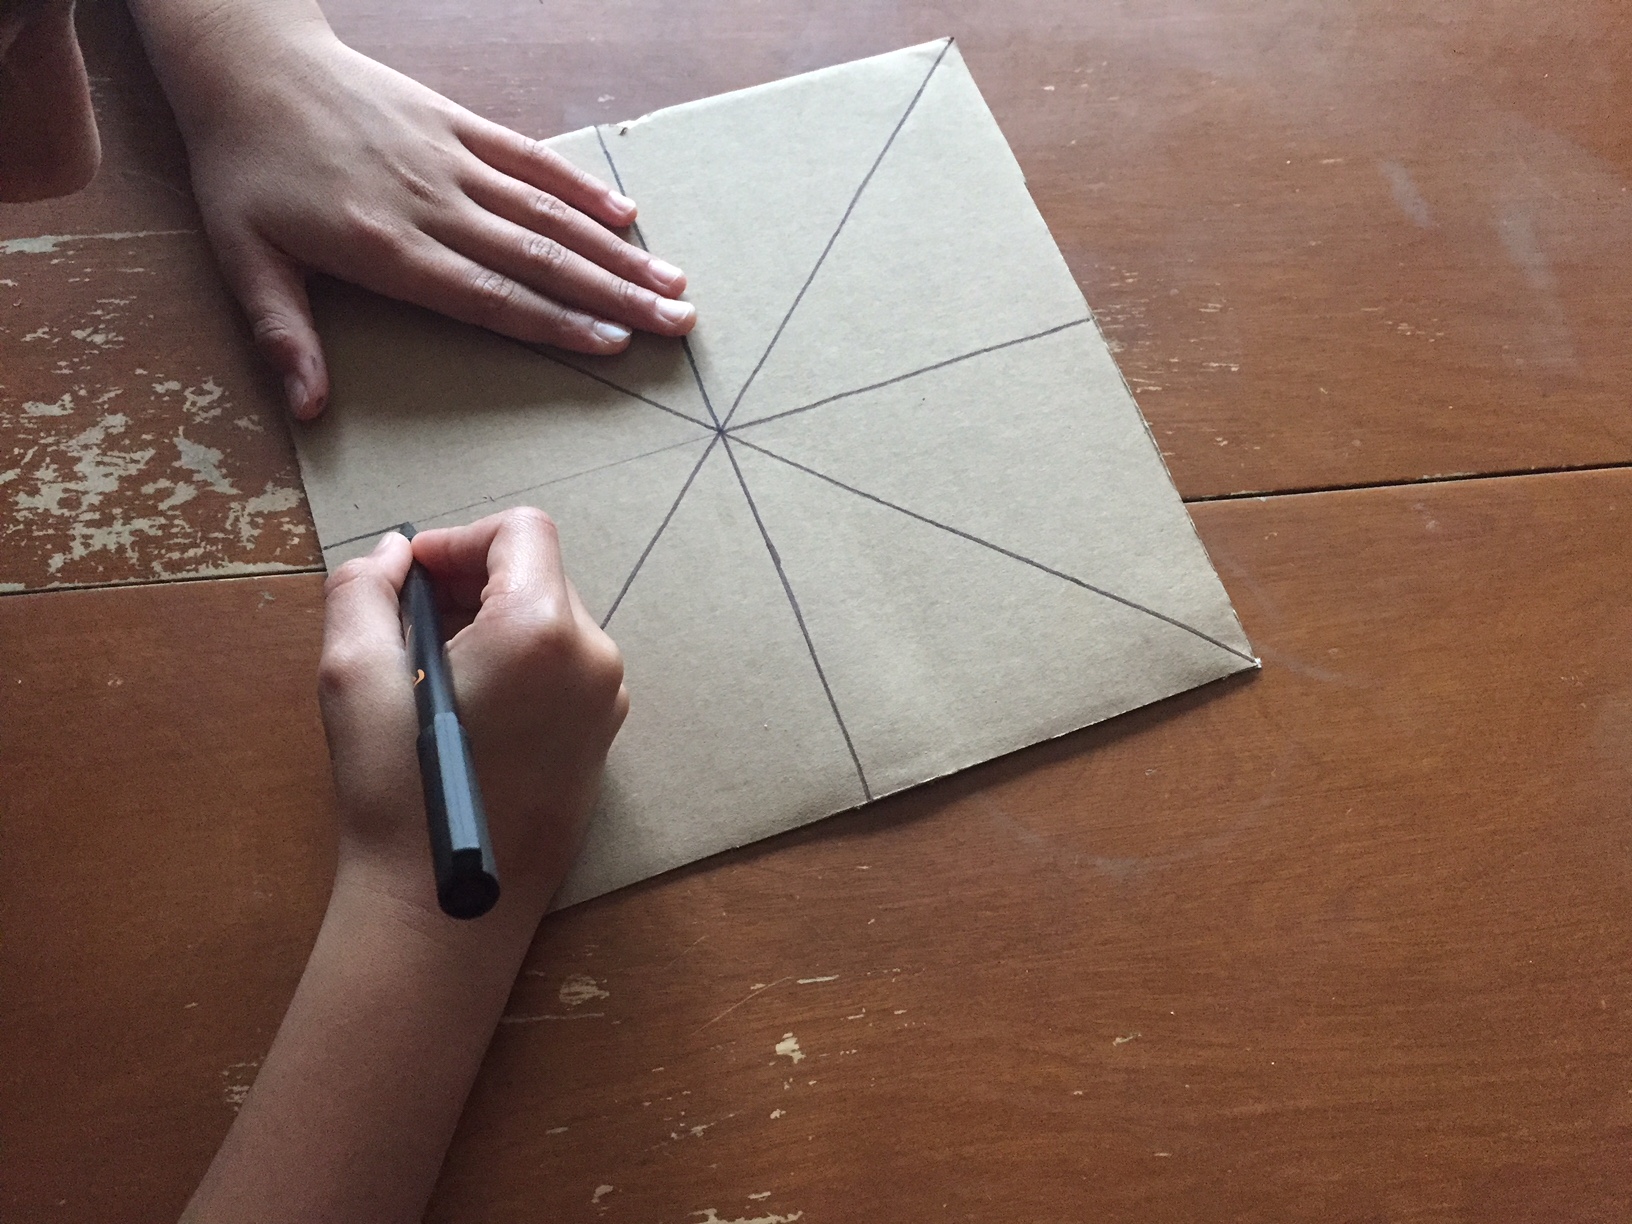
 How to draw the grids:
1. Draw square or circle of your desired size
2. Connect the diagonals if using a square, draw the diameter if using a circle
3. Find the midpoint of each sides of the square and join them
4. Mark the upper and lower half circles into 3 equal parts and join the points with the center of the circle
5. You are ready to create your own unique design. (keeping the proportions of the design will be so much easier if you divide your work space this way! Or you can even come up with your own way of dividing the space!)
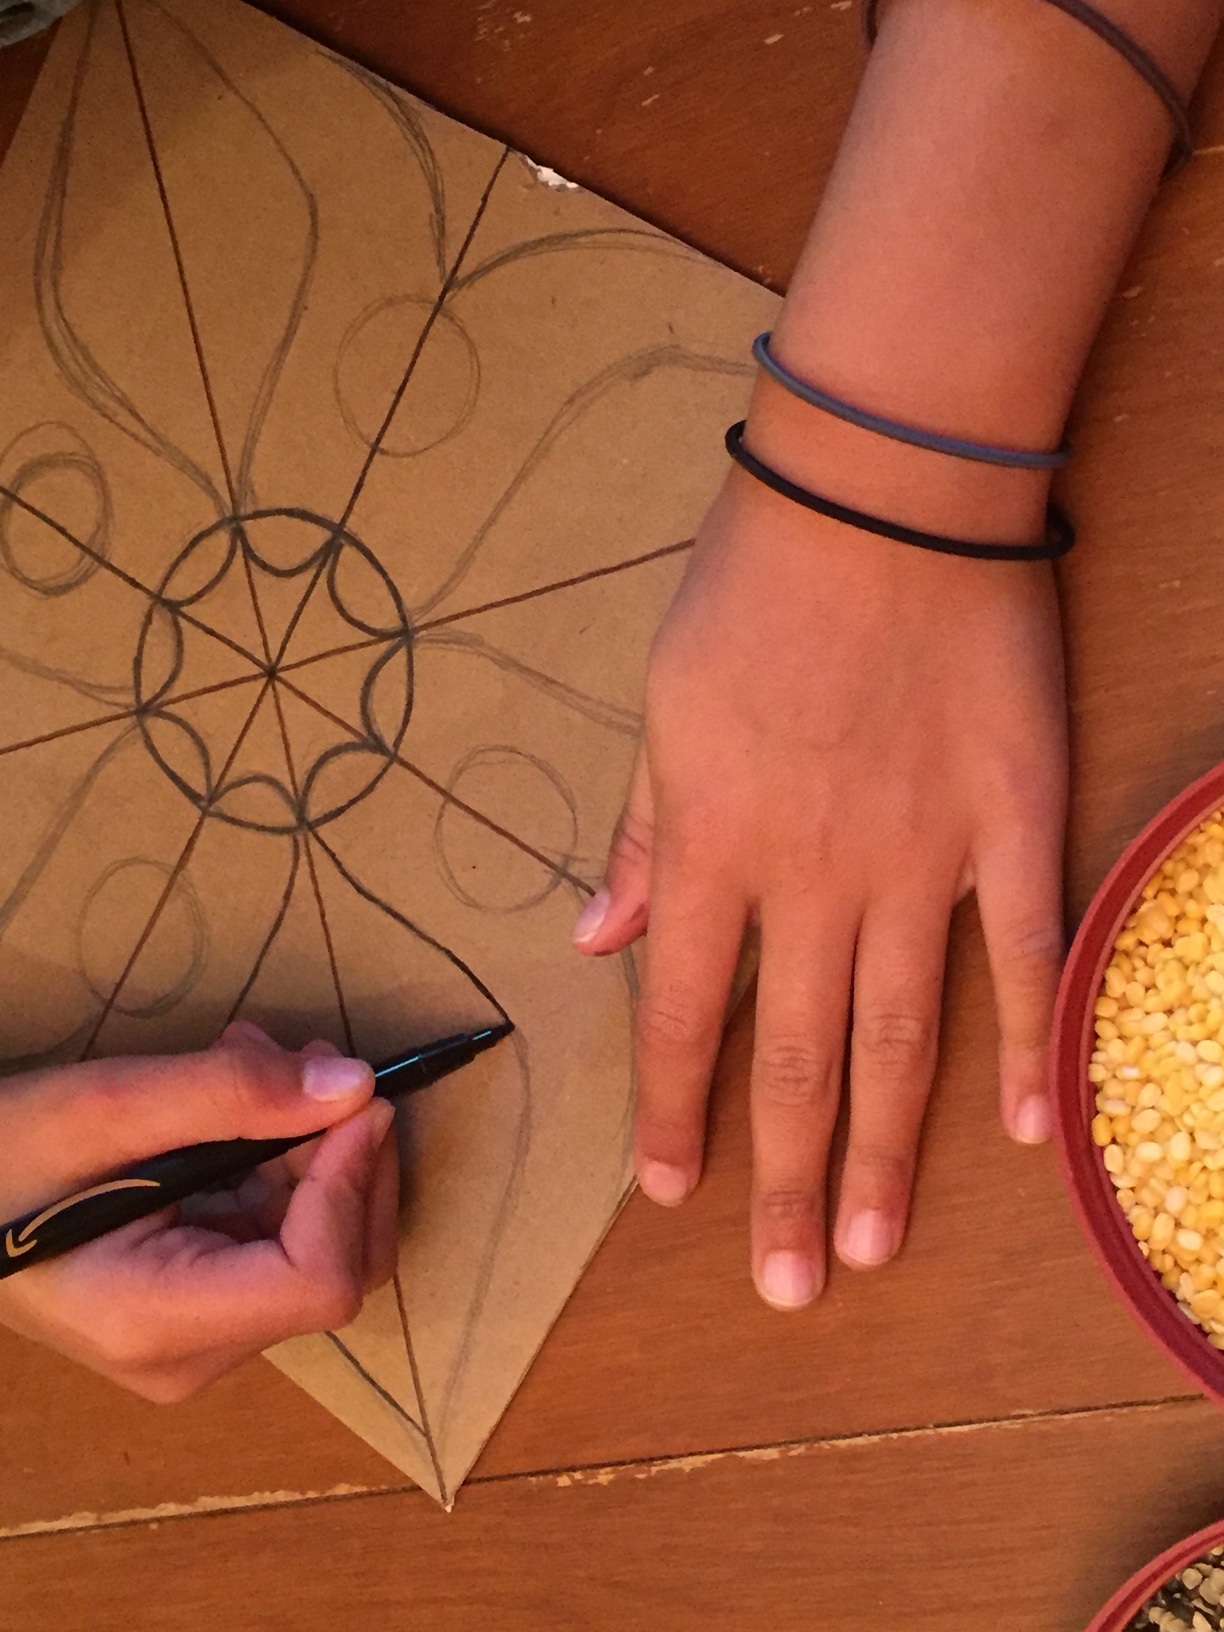
Now comes the exciting part! Creating the design/pattern/Rangoli! I am giving you some ideas how you can make design using the grid as your guideline. Making the proportion right will be really easy for anyone if worked this way. You can start with a very simple design. At the end when covered with colorful Rangoli material (be it colored sand/ gulal/ rice powder/flower petal/different colored lentils), everything looks beautiful! So just jump in with your ideas!
(these are some freehand drawings made on A4 paper with regular ball pen and color pencil. Hope they will spark you to come up with your own simple design)

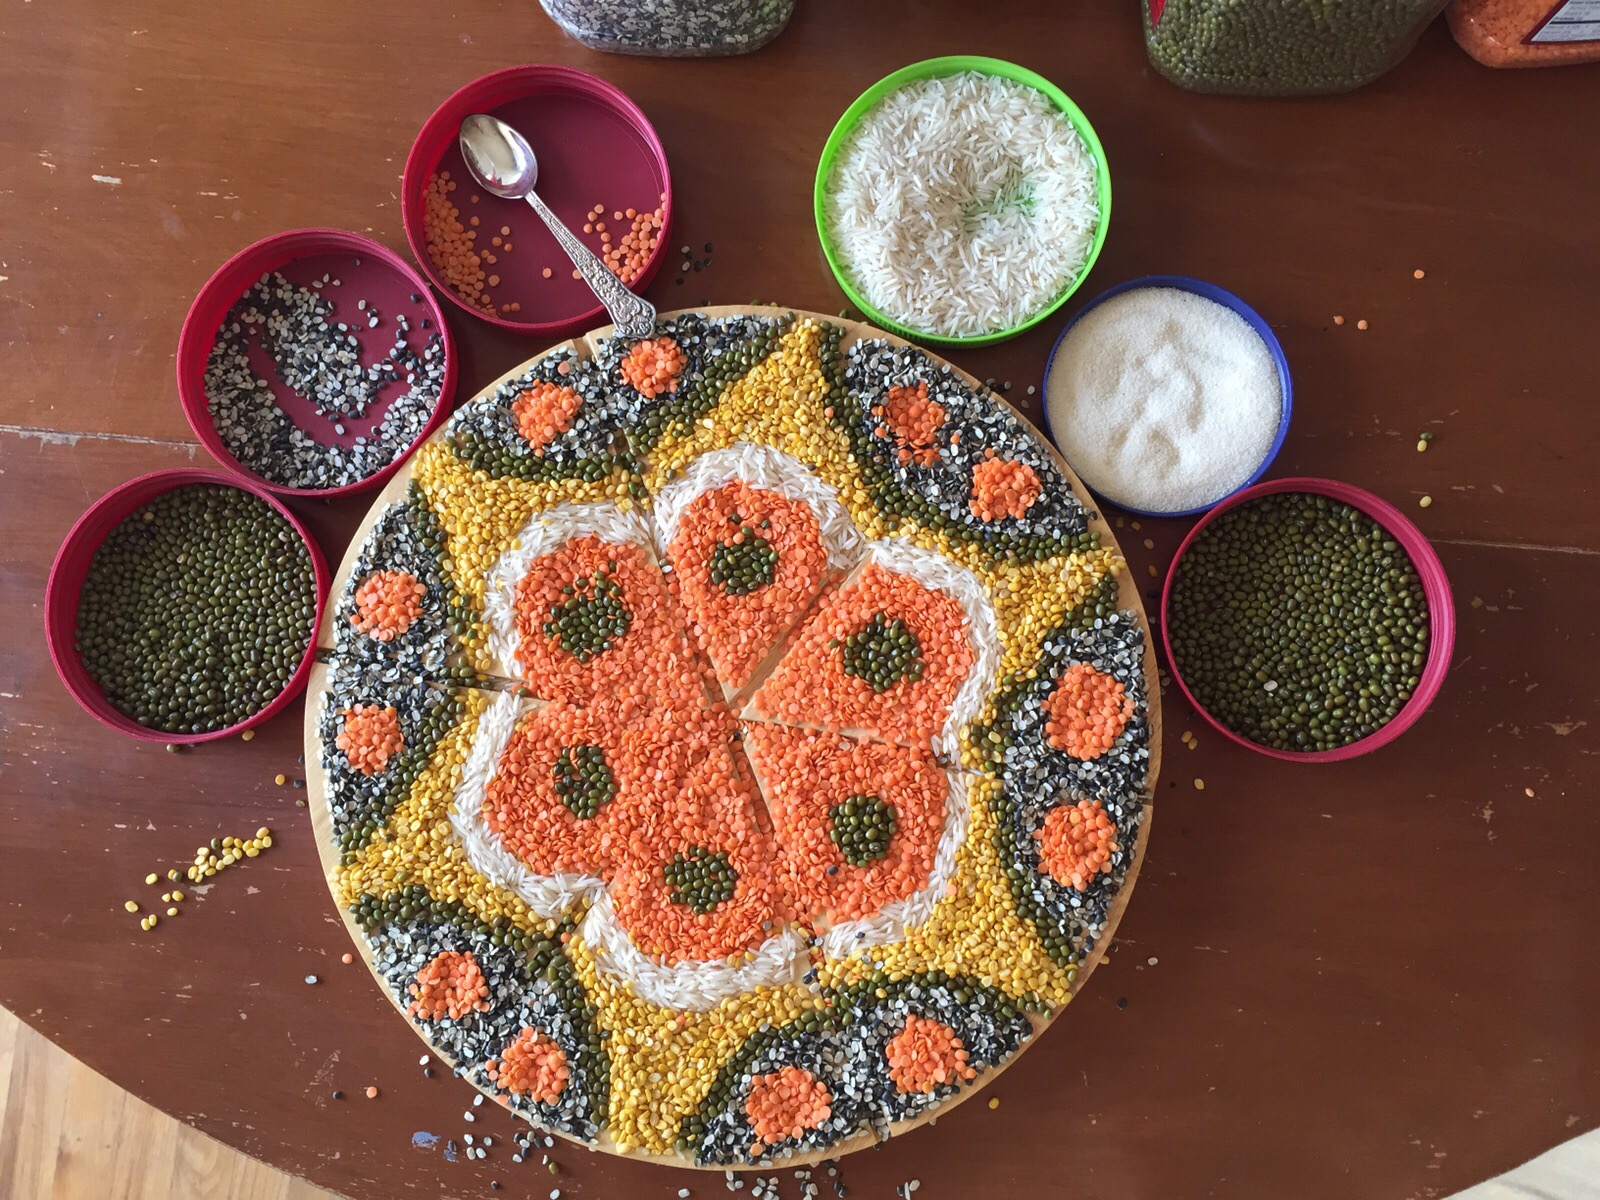
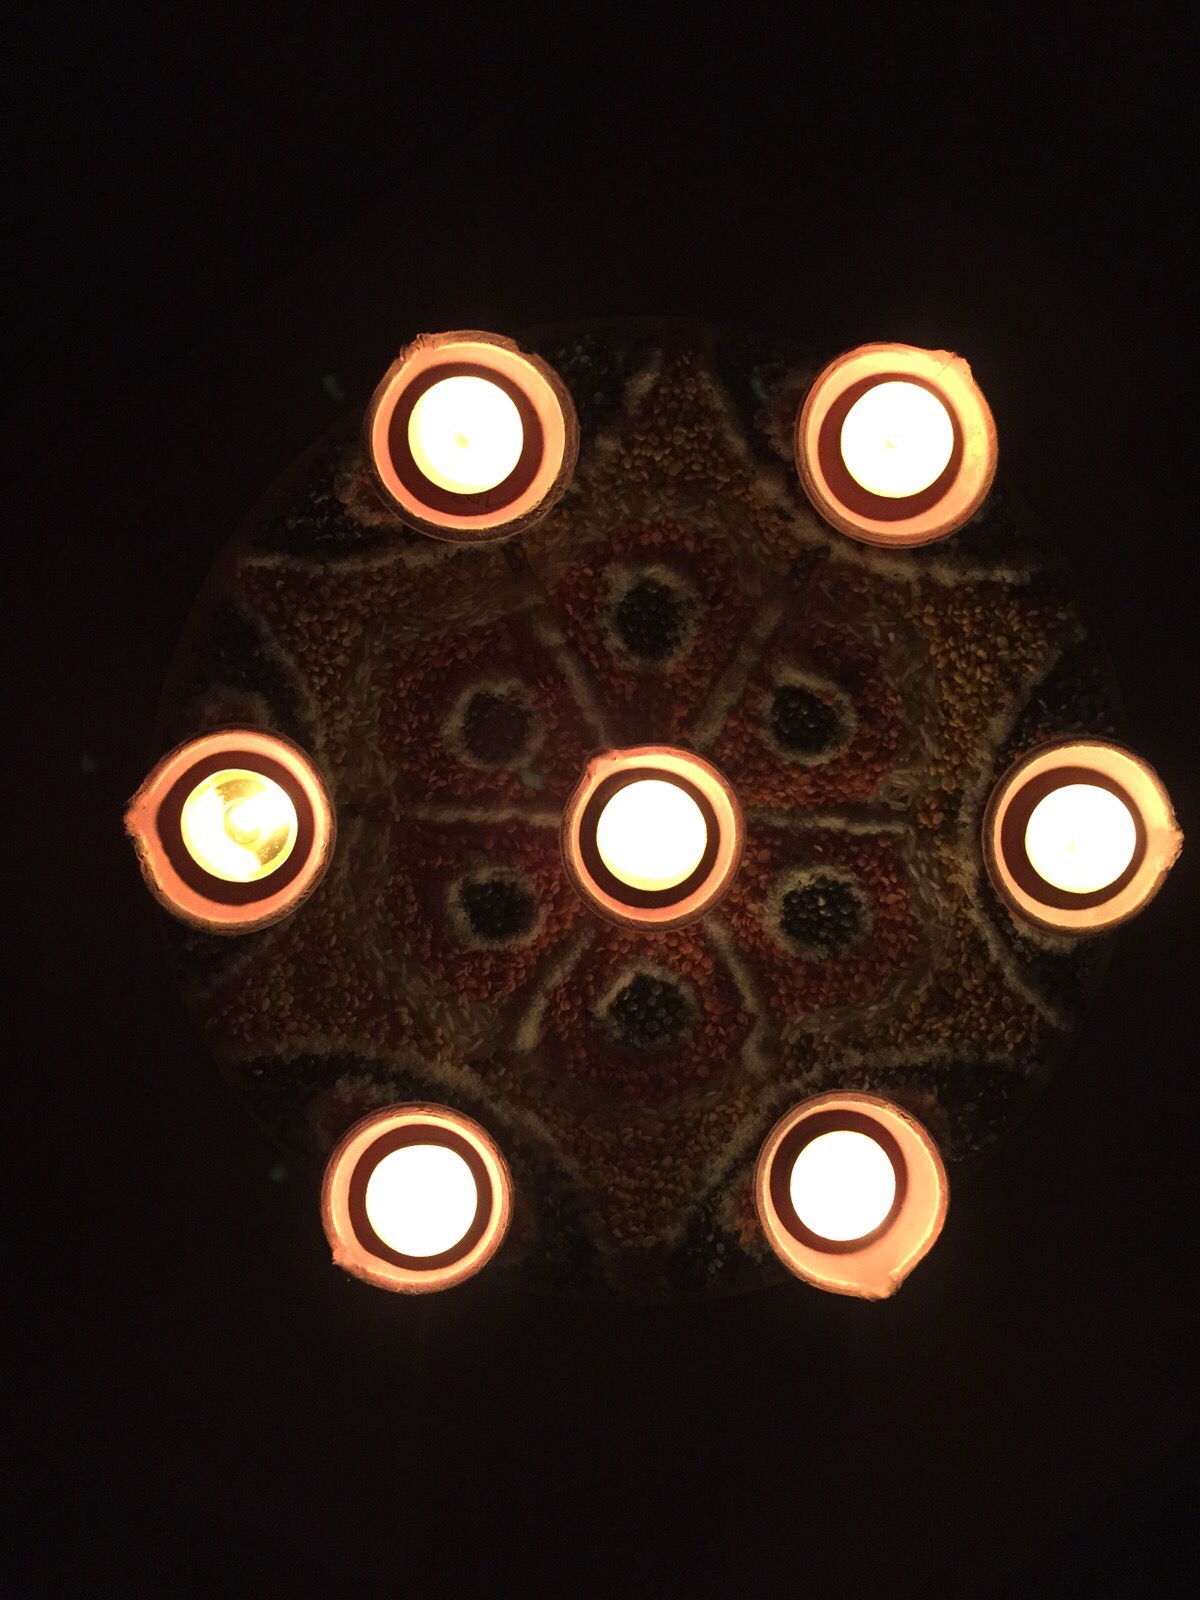
We have used different lentils for our Rangoli. Lentils come in many different colors. It is also less mess while making with the little one. I chose to do it on a piece of cardboard or on top of a wooden circle with grid (found it in a store and and instantly bought and kept it for this purpose). Don’t worry if you don’t have one you can just use a cardboard or do right on the floor. With a hundred pound dog around, I find it safe and easier to make and keep it on the table. We lived in many places where keeping a designated space intact from a running child or pet was a challenge. And a table top has been the best solution for that. If you don’t have much floor space, go ahead and make it on the table.
Materials needed for the Lentil Rangoli:
- Space to make the Rangoli (floor/ cardboard/ table)
- chalk/pen/ pencil to draw the grid and the design.
- Lentils and grains of your choice to fill the design with.
- Semolina/all purpose floor/ rice flower to draw the outlines.
- Handmade paper cone.
Process:
- Choose a place where you want to make your Rangoli
- Draw the grid
- Create your own design
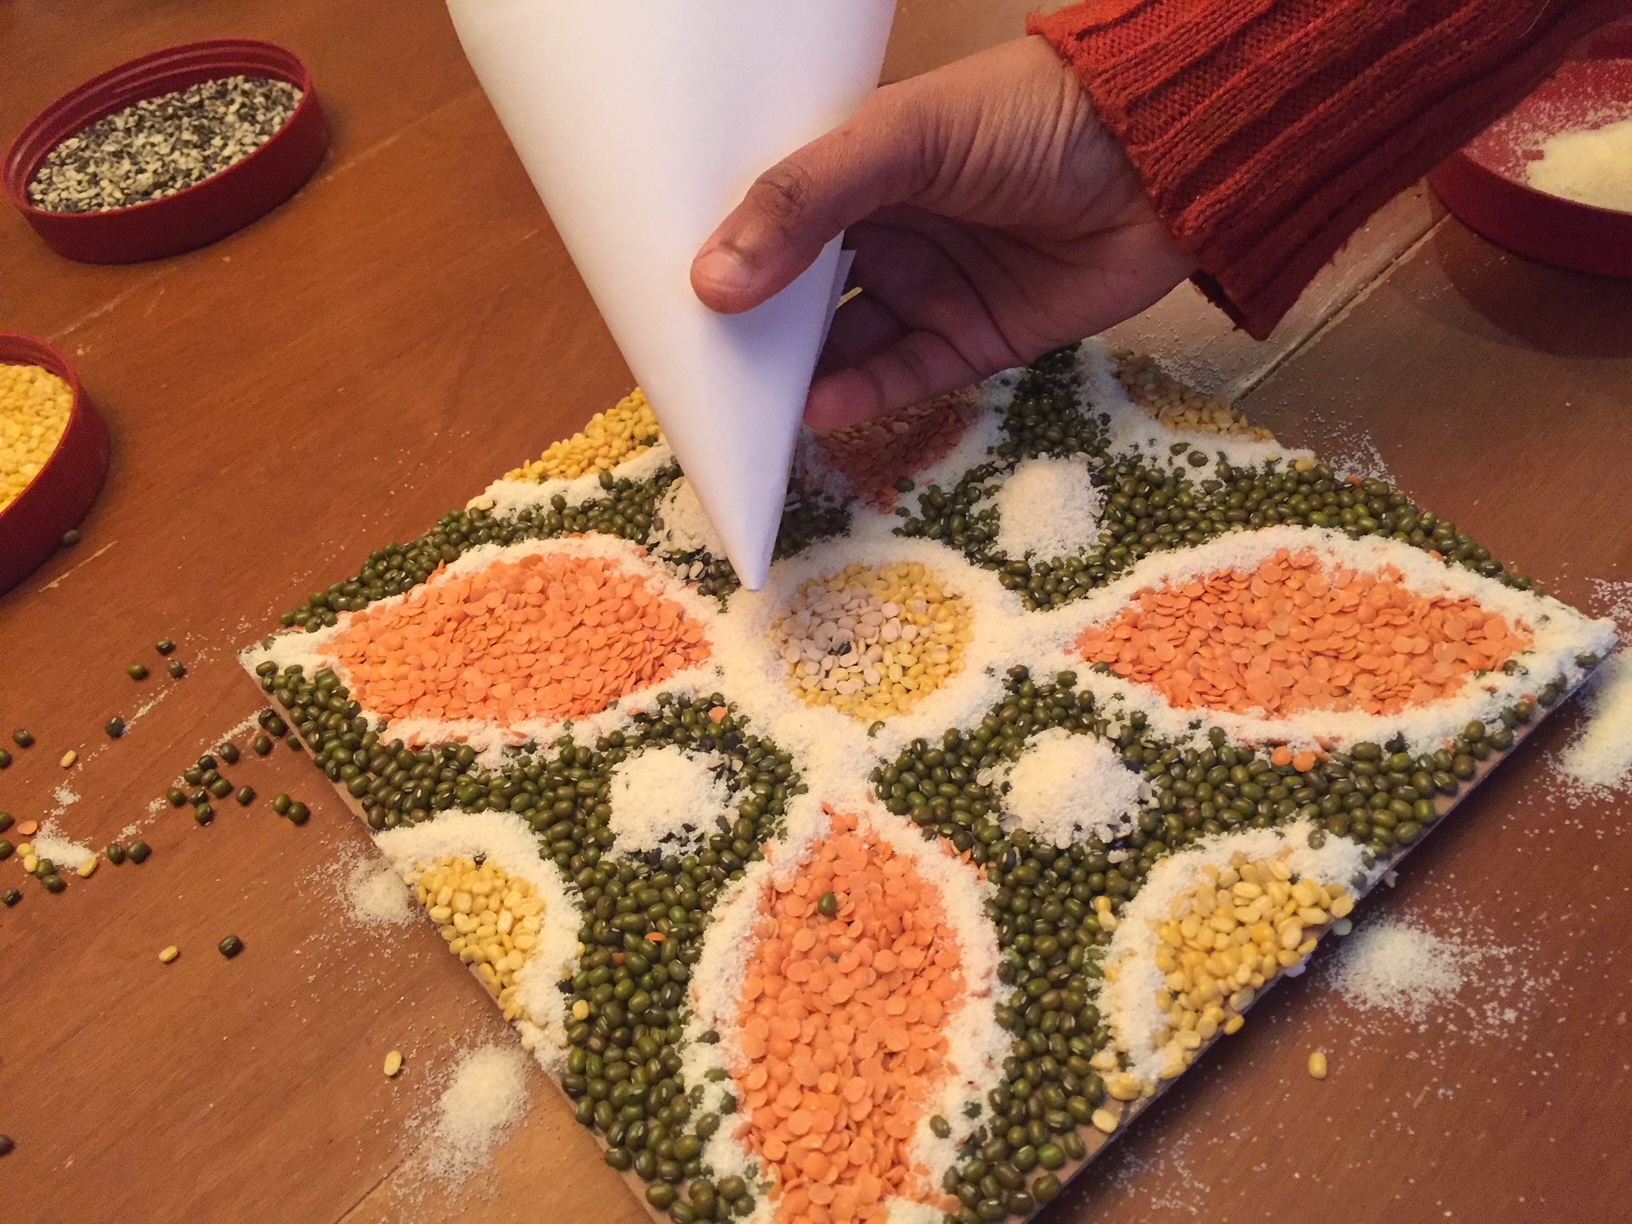
- Fill the design with lentils and grains of your choice
- Draw the outline with a handmade paper cone filled with Rava/suji/semolina/all purpose flour/rice flour
This one is entirely done by the little one. We practiced how to create designs using the grid and then I gave her a square cardboard piece with grids drawn on it. She came up with this! I have added her design in the step by step drawing image (the first one in the square grids).


Then I went ahead and did the outline using suji/rava/semolina poured in a paper cone. As this is a very small design (8in X 8in), drawing the outline with a cone is much easier. You just have to cut a narrow hole in the tip of the paper cone so that the material can flow through it. If you don’t have semolina, you can use all purpose flour or rice flour. Just grind the rice in your coffee grinder and you have your rice flour!
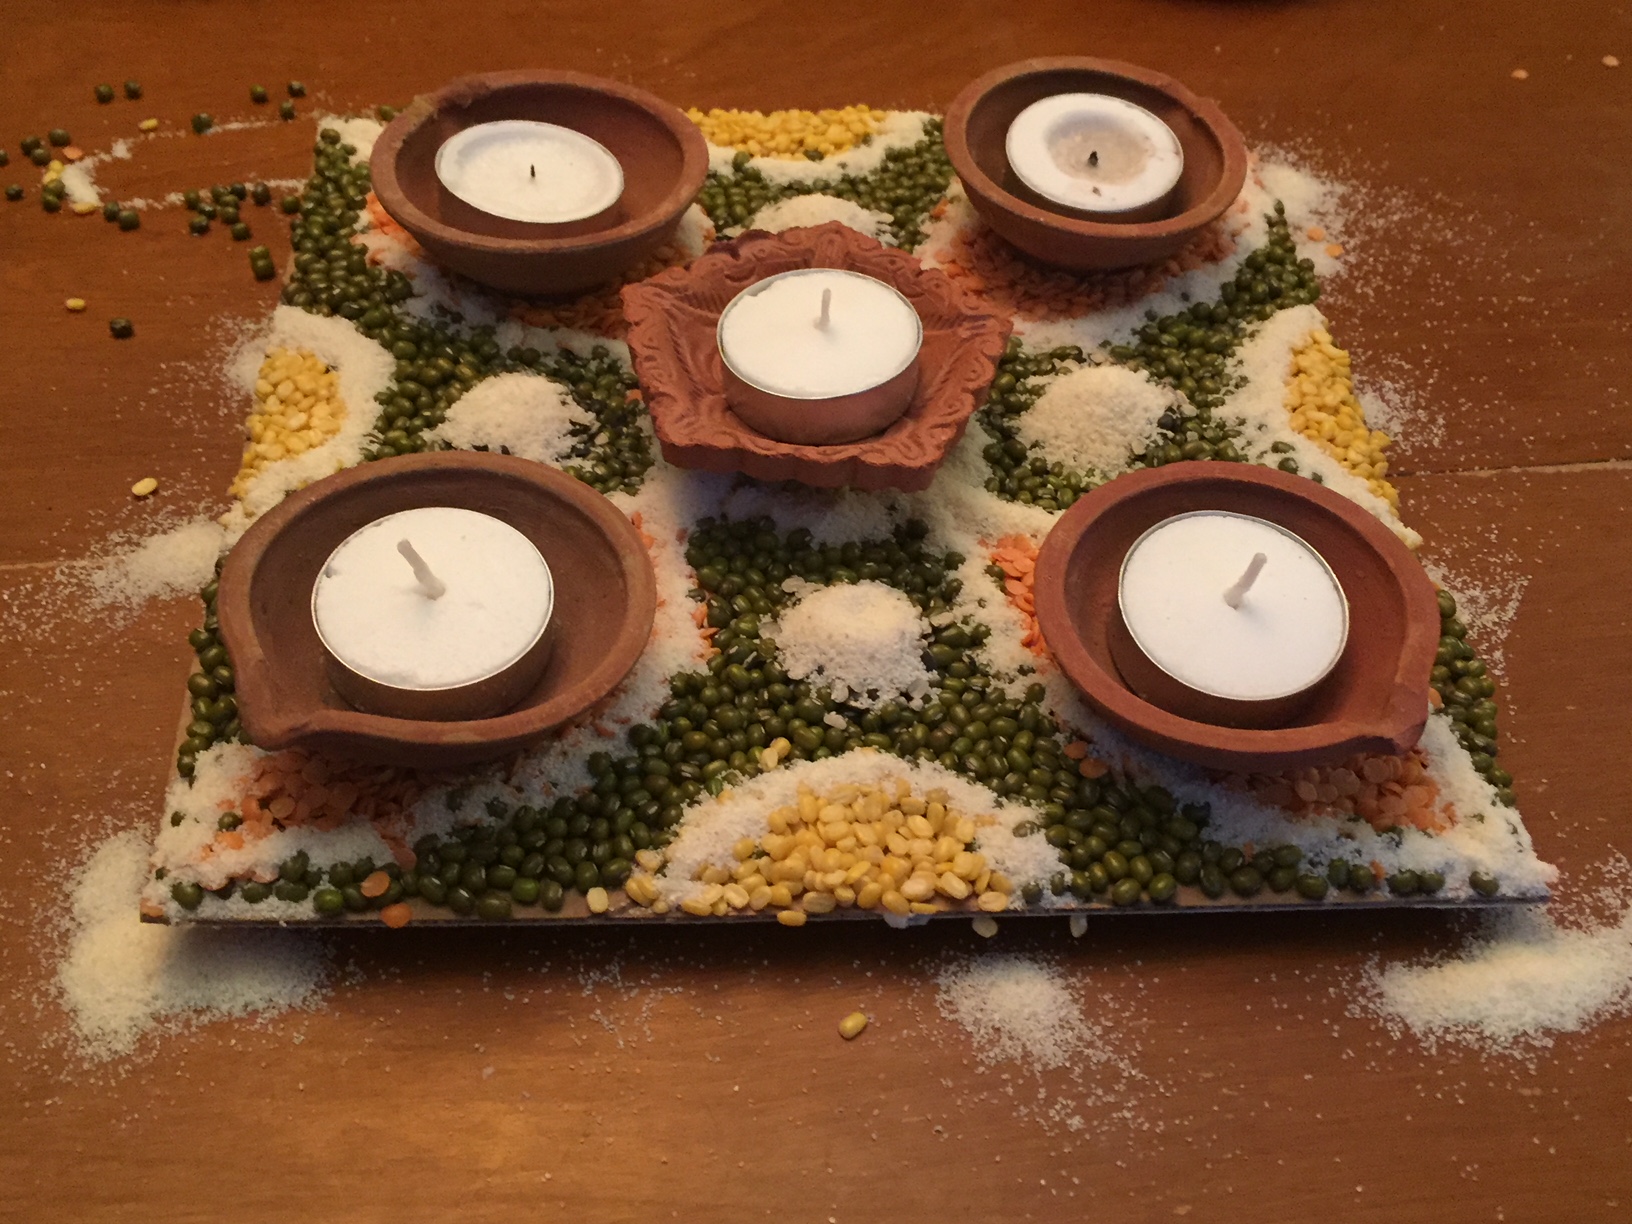

Hope now you have an idea about how you can create beautiful rangoli designs with the children in your life (at home or in the classroom).
Also, would love to see what you have made! So please share your Rangoli in the comment below! By the time I am posting this, Diwali has just past. But that’s not the only time to make a rangoli! You can make it any day you feel festive! May the light brighten your day!
